Release Management
Overview of release management process
A release lifecycle consists of 3 stages including 1) Initialized, 2) Draft, 3) Published. While a draft is being created or a release is being published, the release temporarily shows a transient "Processing" state in the "State" column. Only developers can manage releases; publishing a release additionally requires a user with the Admin right. A release does not have an owner; therefore, after a release has been created, any developer can manage the release. The figure below shows the lifecycle state transitions.
There may be multiple releases in the Initialized state. This can help with release planning. High-level scope of the release can be captured in the release note.
The intended workflow keeps at most one active release draft at any point in time. The release draft allows the standard development team/community to review the changes to the release and the release itself as a whole. Once the review period is over, if some changes are needed the release draft has to be first canceled, and then all changes to CCs (recall that CCs also include developer code lists and the agency ID list) assigned to the draft can be updated again. The release may move back and forth between the Initialized and Draft state until all comments are satisfactorily addressed. Once that is the case, the release can be published, and it is moved to the Published state. In the published state, the release information can no longer be changed.
A release in the Initialized state can be discarded. In such case, the release is purged from the application and can never be restored back.
Find a release
To find a release:
-
On the "Core Component" menu on the top, click the "View/Edit Release" menu item.
-
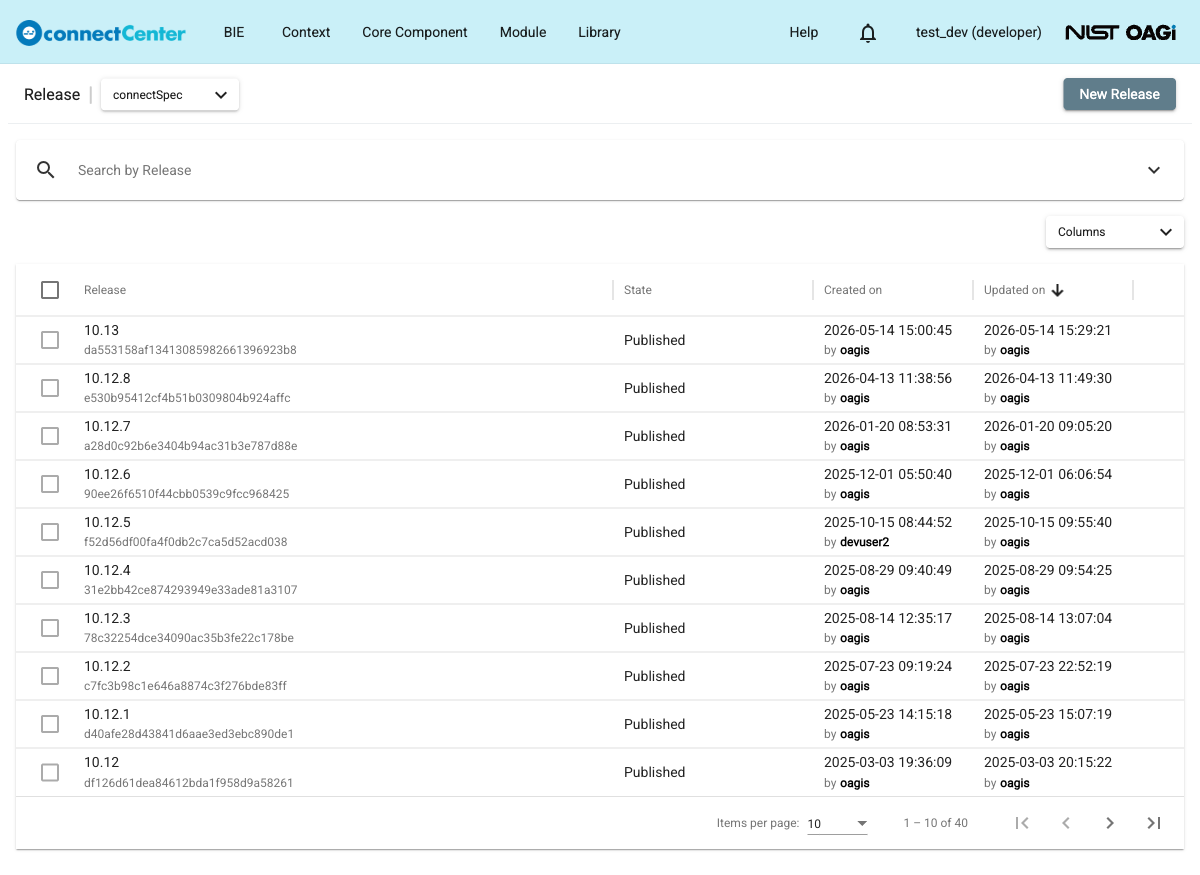
The "Release" page is open listing the releases of the selected library (the internal Working branch is never shown here).
-
Use the pagination buttons on the bottom of the release table to find the desired release. Use the "Items per page" to display more or fewer releases per page. Alternatively, use the search bar and filters described below. When multiple filters are specified, they are connected with the AND logical connector. When they are not specified, they are not considered.
-
The "Search by Release" bar matches the release number as a case-insensitive substring. Note that despite its name, the release number is actually a free text field, not just a number.
-
"State". Select "Initialized", "Draft", or "Published" from the drop-down list. Multiple states can be selected. If nothing is selected, all states are included, i.e., it is the same as selecting all of them.
-
"Creator". Select from the drop-down list the developer who created the release. The user can type in a few characters to narrow down the list.
-
"Created start date" and "Created end date". Specify the time period in which the release was created.
-
"Updater". Select from the drop-down list the developer who last updated the release. The user can type in a few characters to narrow down the list.
-
"Updated start date" and "Updated end date". Specify the time period in which the release was updated.
-
"Namespace". Filter the releases by their release namespace.
-
Create a release
To create a new release:
-
On the "Core Component" menu on the top, click the "View/Edit Release" menu item.
-
The "Release" page is open.
-
Click the "New Release" button at the top-right of the page. The button is available to developers only.
-
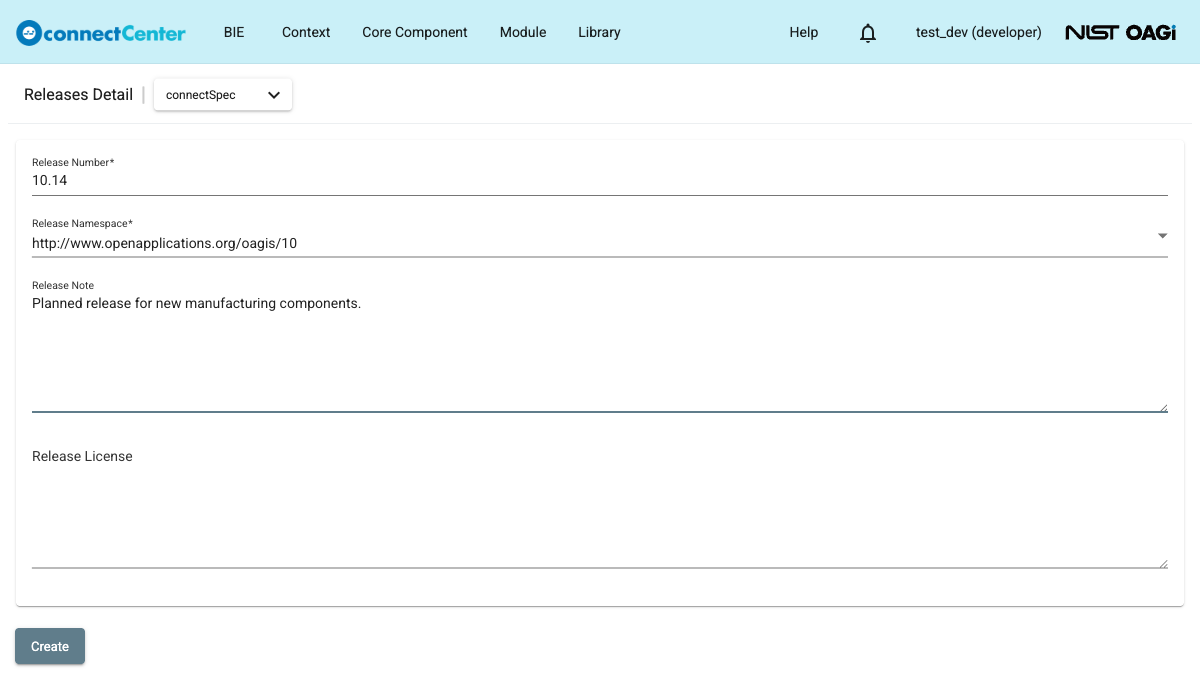
The following fields can be filled in.
-
"Release Number". A freeform text representing the release number such as "10.0" or "10.0rc". The release number must be unique within the library; a duplicate is rejected with a message such as "'10.0' already exists." "Release Number" is required.
-
"Release Namespace". Select from the drop-down list a Standard namespace. See also Namespace Management. "Release Namespace" is required.
-
"Release Note". A freeform text that describes or gives an overview of the release. The field is optional.
-
"Release License". A freeform text indicating the licensing of the CC release. The field is optional.
-
-
Click the "Create" button.
-
The "Release" page opens showing the created release in the Initialized state.
View detail of a release
-
Click on the release number to open the release detail page.
Edit detail of a release
Detail of a release can be edited while it is in the Initialized or Draft state. Any developer can edit the detail of a release. To change the detail of a release:
-
Fields of the release detail can be updated in the same way as when the release was first created.
-
Click the "Update" button.
Create a release draft
In the release draft creation process, CCs in the Candidate state can be assigned to a release that is in the Initialized state. Any developer can create a release draft from a release in the Initialized state. To create a release draft:
-
Open the detail page of a release that is in the Initialized state and click the "Create Draft" button. Alternatively, open the "Release" page by clicking "View/Edit Release" under the "Core Component" menu; then, click on the ellipsis in the last column of the desired initialized release and select "Create Draft".
-
The "Release Assignment" page is open. The page has two panes left and right. The left, aka "Modified" pane, has all the CCs (recall that CCs also include code lists and the agency ID list) created/changed in the Working branch. The right, aka "Assigned" pane, contains CCs assigned to the release and is initially empty.
-
Assign CCs to the release by selectively dragging CCs that are in the Candidate state from the left pane to the right pane. Alternatively, use the double-arrowhead icon (>>) on the top of the left pane to assign all CCs in the Candidate state. CCs on the right pane can also be dragged back to the left pane to unassign.
-
After all new and updated CCs planned for the release have been assigned,
-
Click the "Validate" button at the bottom of the page. This step is optional. If there is any error such as when some CCs used by CCs assigned to the release are not included in the release, error messages are displayed. Warnings are also given for certain situations such as updated CCs that are not assigned to the release.
-
Click the "Create" button at the bottom of the page and confirm in the "Create Release Draft?" dialog. If the release assignment has not been validated, the system validates the assignment. If there is any error, the draft is not created. If there is no error, the system starts the process to create the release draft.
-
-
The "Release" page is open showing that the release draft is being created – the "State" column shows "Processing". If there are not hundreds of new or changed CCs, the release draft processing can finish in a few seconds. The page is NOT automatically refreshed when the processing is done. The user has to refresh the page to see whether the processing is done. When that is the case, the "State" column will display "Draft". At this stage, the user may go to the "Core Component" page and on the "Branch" selector at the top-left of the page select the release draft from the list to review all CCs in the release draft. The user may also want to notify other developers or end users that the release draft is ready for review.
Review a release draft
Once a release draft has been created, users, both developers and end users, can review the release. To do so:
-
Open the "Core Component" page by clicking the "Core Component" menu on the top and selecting "View/Edit Core Component".
-
In the "Branch" selector at the top-left of the page, select the branch of the release draft (the entries show the release numbers).
-
CCs in the release draft are listed. There should be CCs in only two states, Release Draft and Published. The published ones are those CCs with no change from the previous release. The release draft ones are those CCs that are either new or revised in the release draft.
-
Use other filters as described in Search and Browse CC Library.
-
Click on the DEN of a CC to open its detail page. See also View Change History of a CC.
-
If changes to any CCs in the release draft are needed, the release draft has to be cancelled first.
The release detail page of a Draft or Published release also offers a "What's changed" button, which lists the new and revised components of the release.
Discard a release
A release in the Initialized state can be discarded. In such case, the release is purged from the application and can never be restored back. To discard a release:
-
Open the "Release" page by clicking "View/Edit Release" under the "Core Component" menu on the top.
-
Find a release to be discarded.
-
Click on the ellipsis in the last column of the release to be discarded and select "Discard".
-
Confirm (or cancel) the request on the confirmation dialog.
Cancel a release draft
If changes to any CC in the release draft are needed, the release draft needs to be canceled first. The cancellation frees CCs from the release and puts those ones with changes back to the Candidate state. CCs that need modification can then be put back in the WIP state to make further changes.
-
Open the "Release" page by clicking "View/Edit Release" under the "Core Component" menu on the top.
-
Find a release that is in the Draft state that is to be canceled.
-
Click on the ellipsis in the last column of the release draft and select "Move back to Initialized". Alternatively, click the release number to open the detail page and click the "Back to Initialized" button.
-
A dialog appears to confirm or cancel the release draft cancellation.
Publish a release
After a release draft has been reviewed and accepted, it can be published. Publishing requires a user with the Admin right; a non-admin user is rejected with the message "Only administrators can publish the release." No further changes can be made to the release after it is published. To publish a release draft:
-
Open the "Release" page by clicking "View/Edit Release" under the "Core Component" menu at the top of the connectCenter page.
-
There are two ways to publish a release:
-
If there is no need to update any release detail, the release can be published by clicking on the ellipsis in the last column of the release draft and selecting "Move to Published". Confirm in the dialog. It is important to note that release detail cannot be changed after the release is published.
-
If there is a need to update some release detail:
-
Open the detail page of the release that is in the Draft state.
-
Release detail can be updated in the same way as when the release was first created.
-
Click the "Publish" button.
-
Confirm in the dialog.
-
-
-
The "Release" page opens showing that the release is being published – the "State" column shows "Processing". If there are not hundreds of new or changed CCs, the publish processing can finish in a few seconds. The page is NOT automatically refreshed when the processing is done. The user has to refresh the page to see whether the processing is done. When that is the case the "State" column will display "Published". At this stage, the user may go to the "Core Component" page and on the "Branch" selector at the top-left of the page select the release from the list to see all CCs in the published release.
Generate the migration script
After a new release has been published, developers can download the migration script for the new release. The script contains all developer records, including core components, code lists, agency ID lists, modules, etc. The button appears only on the latest published release. To download the script:
-
If you also want the developer-defined sibling ordering (see Order sibling components in the tree) to be reproduced when the script is applied, check the "Include sibling view order" checkbox next to the button.
-
Click the "Generate Migration Script" button. A ZIP file named after the release number is downloaded.