Namespace Management
All CCs require a namespace before they can leave the WIP state or be put into a release. Namespaces are designated as either Standard (i.e., developer namespace) or Non-standard (i.e., end user namespace).
Namespace is used for two purposes in connectCenter - 1) It designates the universe to which the CC belongs and 2) It can be used in XML schema or other syntactical expression; however, some overriding can occur during the expression.
Find a namespace
-
Click on the "View/Edit Namespace" under the "Core Component" menu at the top of the page.
-
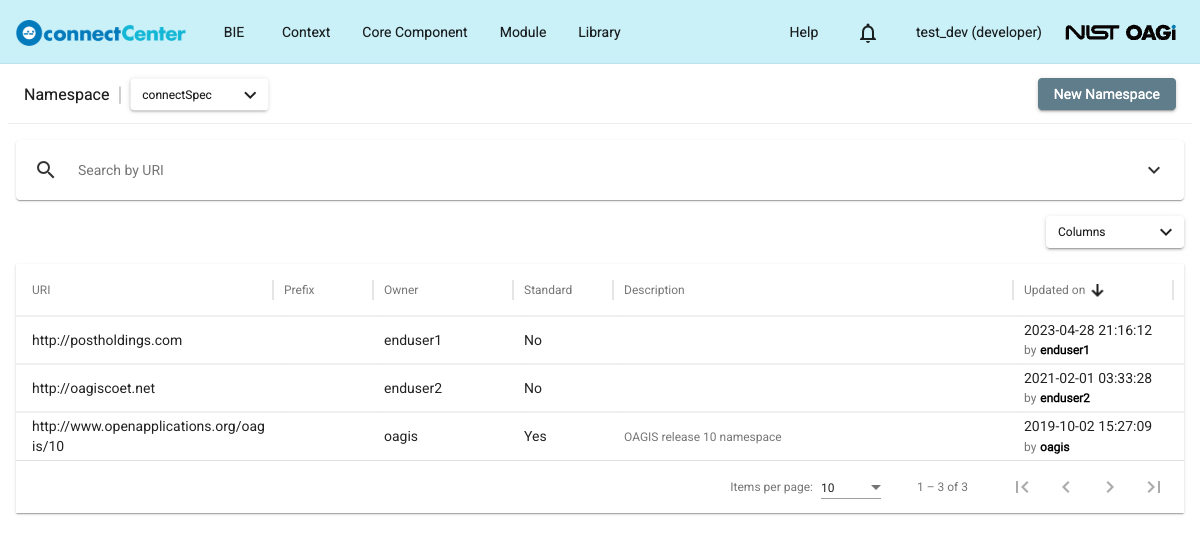
Use the "Search by URI" bar on the top or use pagination buttons at the bottom of the page to find the desired namespace. The chevron-down button at the right end of the search bar expands advanced filters: "Owner", "Updater", "Updated start date", "Updated end date", "Description", "Prefix", and "Standard".
-
Click on any column header to sort the namespaces. This can also help find the desired namespace.
View detail of a namespace
-
The default columns of the namespace table (URI, Prefix, Owner, Standard, Description, Updated on) show the whole detail of the namespace; or click on the URI of the desired namespace to open the "Namespace Detail" page.
tipOn some browsers, hold down Ctrl on the keyboard and click to open the detail page in a new tab.
Edit detail of a namespace
-
The user has to be the owner of the namespace to make changes, but the ownership can be transferred. See also Transfer ownership of a namespace.
-
Click on the URI of the desired namespace to open the "Namespace Detail" page.
-
Change the properties of the namespace. The URI is required and must look like a URI (a scheme followed by a colon and a body, e.g. "http://example.com/ns"); an invalid value is rejected with a message such as "'value' is not allow for URI format". The "URI" and the "Prefix" must each be unique within the library.
-
Click "Update" to save changes or click "Back" to cancel changes.
Create a namespace
-
Click on the "View/Edit Namespace" under the "Core Component" menu at the top of the page.
-
Click the "New Namespace" button at the top right of the page.
-
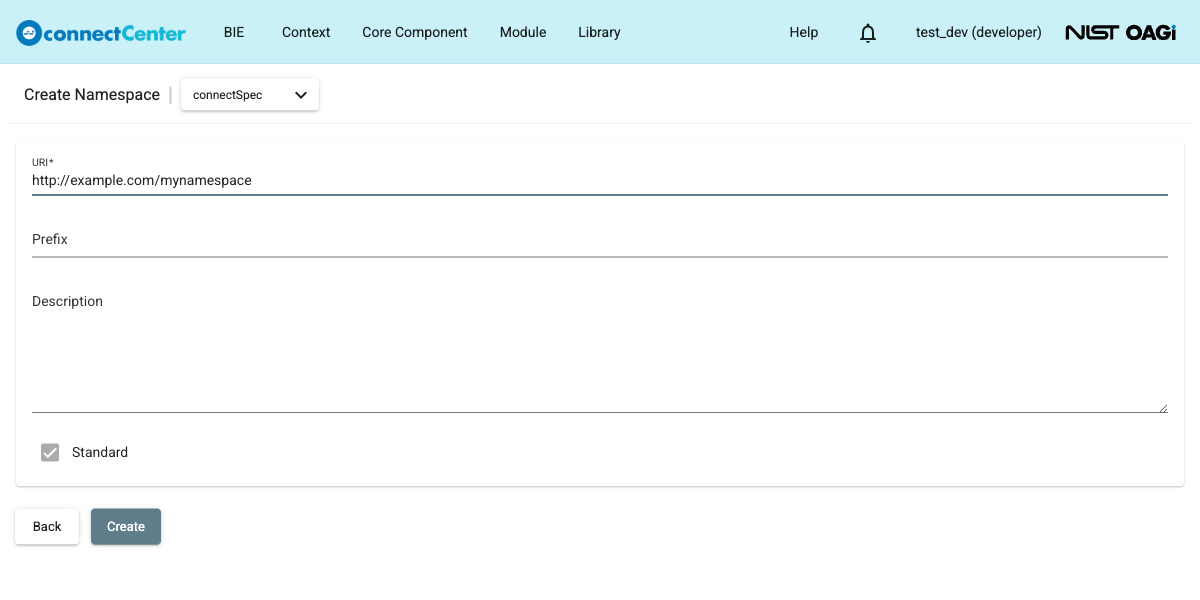
Specify at least the "URI" (see Edit detail of a namespace for the accepted format). Optionally fill out the "Prefix" (the token used as the namespace prefix in XML schemas) and the "Description".
-
Note that a namespace created by a developer user is always a Standard namespace: the "Standard" checkbox is checked and locked. When an end user creates a namespace, the "Standard" checkbox is unchecked and locked, i.e., the namespace is an end-user namespace. The designation cannot be changed after creation.
-
Click "Create" to save the new namespace or click "Back" to cancel.
Discard a namespace
Discard permanently deletes the namespace. Only the owner can discard, but the ownership can be transferred. See also Transfer ownership of a namespace.
-
There are two ways to invoke the discard function.
-
Click on the three-dot ellipsis on the right of the namespace to discard and click on "Discard", or
-
Open the detail page of the namespace and click the "Discard" button.
-
-
Click "Discard" again on the pop-up dialog to confirm; or click "Cancel" to go back. If the namespace is not used by any other entity, it will be discarded. Otherwise, the message "The namespace in use cannot be discarded." is returned.
Transfer ownership of a namespace
If another user needs to update or manage the namespace, its ownership must be transferred to that user. The current owner of the namespace (or a user with the Admin right) can transfer it to another user. The transfer can occur only between the same user types – developer or end user. Note that the transfer controls on the "Namespace" page appear only for the current owner; a user with the Admin right transfers namespaces from the "Admin" > "Transfer Ownership" page instead.
-
There are two ways to invoke the ownership transfer function.
-
Click on the two opposite arrows icon next to the username in the "Owner" column, or
-
Click on the three-dot ellipsis on the right of the namespace entry, then click "Transfer Ownership".
-
-
The dialog listing transferable users pops up. Use the search fields or pagination to find the desired user.
-
Check the checkbox in front of the user entry and click "Transfer". Alternatively, click "Cancel" to go back.