Manage Module Set Release
Find a Module Set Release
To find a Module Set Release:
-
On the "Module" menu at the top, click the "View/Edit Module Set Release" menu item if you are a developer, or the "View Module Set Release" menu item if you are an end user.
-
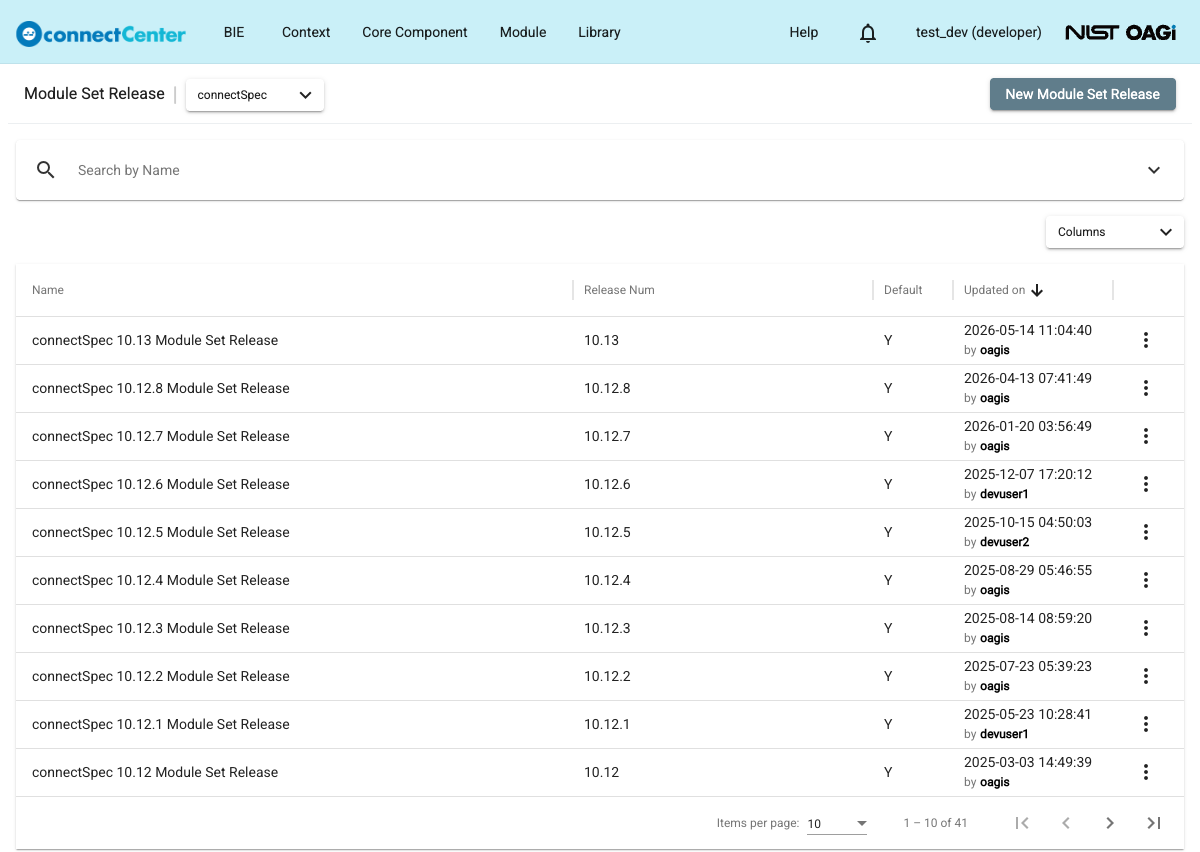
The "Module Set Release" page opens, listing the Module Set Releases of the library selected next to the page title. The "Default" column shows a "Y" for the default Module Set Release of each release, and the "Release Num" column links to the release.
-
Use the "Search by Name" bar at the top of the page to search for the desired Module Set Release. The chevron-down button at the right end of the search bar expands advanced filters: "Updater", "Updated start date", and "Updated end date". See also How to use Search Filters.
View detail of a Module Set Release
-
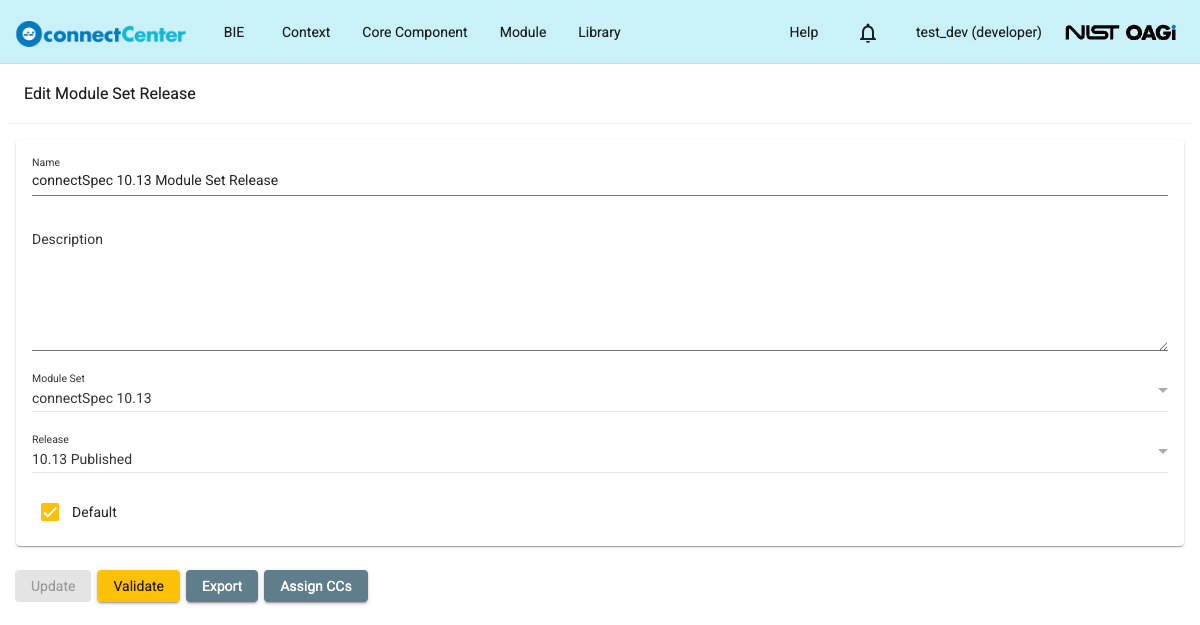
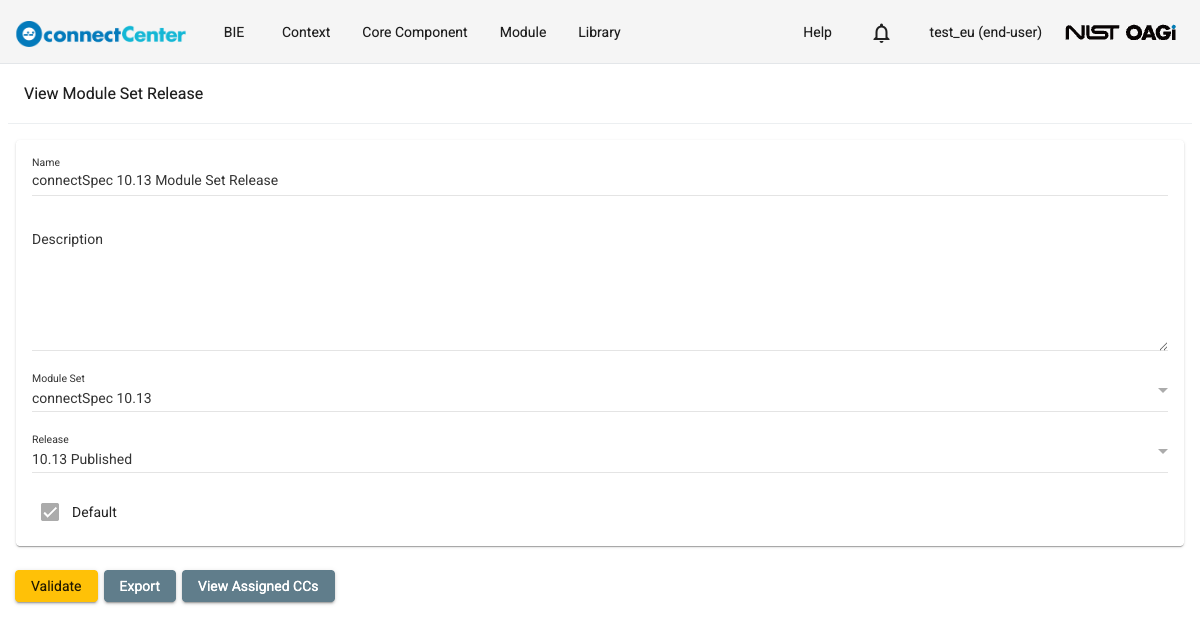
Click on the name of the Module Set Release to open the "Edit Module Set Release" page (titled "View Module Set Release" for end users).
Create a new Module Set Release
To create a Module Set Release:
-
Go to the "Module Set Release" page by clicking the "View/Edit Module Set Release" menu item under the "Module" menu.
-
Click the "New Module Set Release" button.
-
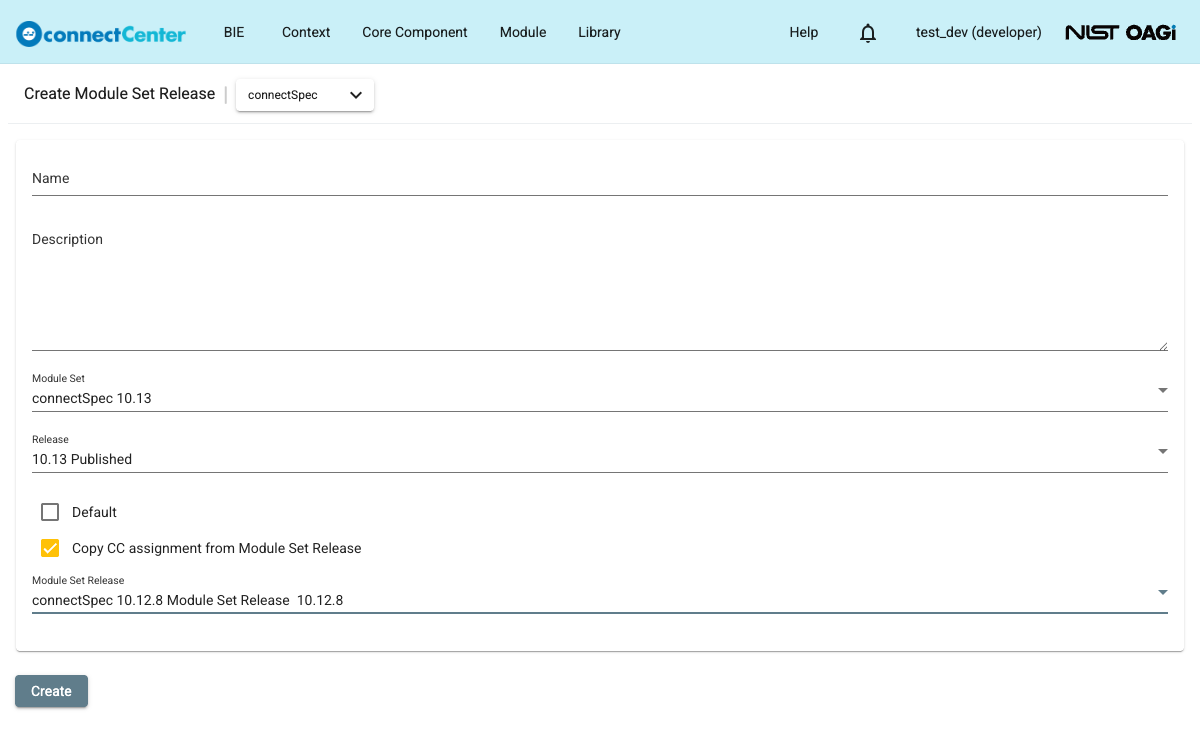
In the returned "Create Module Set Release" page, set:
-
Name. This is a freeform text field for the name of the Module Set Release. It is optional; if it is left blank, it is automatically populated in the form "[Name of the selected Module Set] Module Set Release". A truncation rule is applied to avoid duplication of overlapping words. For instance, if the name of the selected Module Set is "Sample Module", the default name of the Module Set Release will be "Sample Module Set Release". If there is an existing Module Set Release with the same name as the one being entered for the same Release, the "Create module set release?" dialog is returned in order to confirm the intention to reuse the name.
-
Description. Specify the description of the Module Set Release. This field is a free form text and is optional.
-
Module Set. Select the Module Set from the dropdown list. This field is mandatory. You might need to create a new Module Set first.
-
Release. Select the Release from the dropdown list. You can select any Release in any state, including the Working branch. This field is mandatory. Creating a Module Set Release for the Working or a draft Release branch allows for serialization of CCs before the release is published, for testing and validation.
-
Default. Check the "Default" checkbox to make this new Module Set Release the default one for the selected Release (or branch). If a default Module Set Release already exists for the selected Release, the "Create default module set release?" dialog asks to confirm your intention; confirming moves the default flag to the new Module Set Release. The CC assignments in the default Module Set Release are used in related CC management functions, e.g., in the "Module" filter on the View/Edit Core Component page.
-
Copy CC assignment from Module Set Release. Checking this checkbox enables the "Module Set Release" dropdown below it, where the source Module Set Release must be selected. The new Module Set Release is then initialized with the CC assignments of the source: connectCenter matches the CCs across the two Releases by their GUID and the modules across the two Module Sets by their path, and assigns the matched CCs to the matched modules. The purpose of this is to save time on manual CC assignments, since most CCs of a new release are typically assigned to the same modules as in the previous release. It should be noted that this copying can be performed only at the Module Set Release creation.
-
-
Click "Create". A "Created" message confirms the creation and the Module Set Release list page is reloaded.
Edit detail of a Module Set Release
-
View detail of a Module Set Release.
-
The Name, Description, and Default fields can be updated; the Module Set and Release associations cannot be changed after creation. Unchecking Default leaves the Release without a default Module Set Release; checking it when another default exists asks for a confirmation, and confirming moves the default flag.
-
Click "Update" to save the changes. The button stays disabled until a change is made, and an "Updated" message confirms the save.
For end users the page is read-only: the "Update" button is not present and the "Assign CCs" button reads "View Assigned CCs", while "Validate" and "Export" remain available.
Assign CCs to a Module File
-
Click the "Assign CCs" button.
-
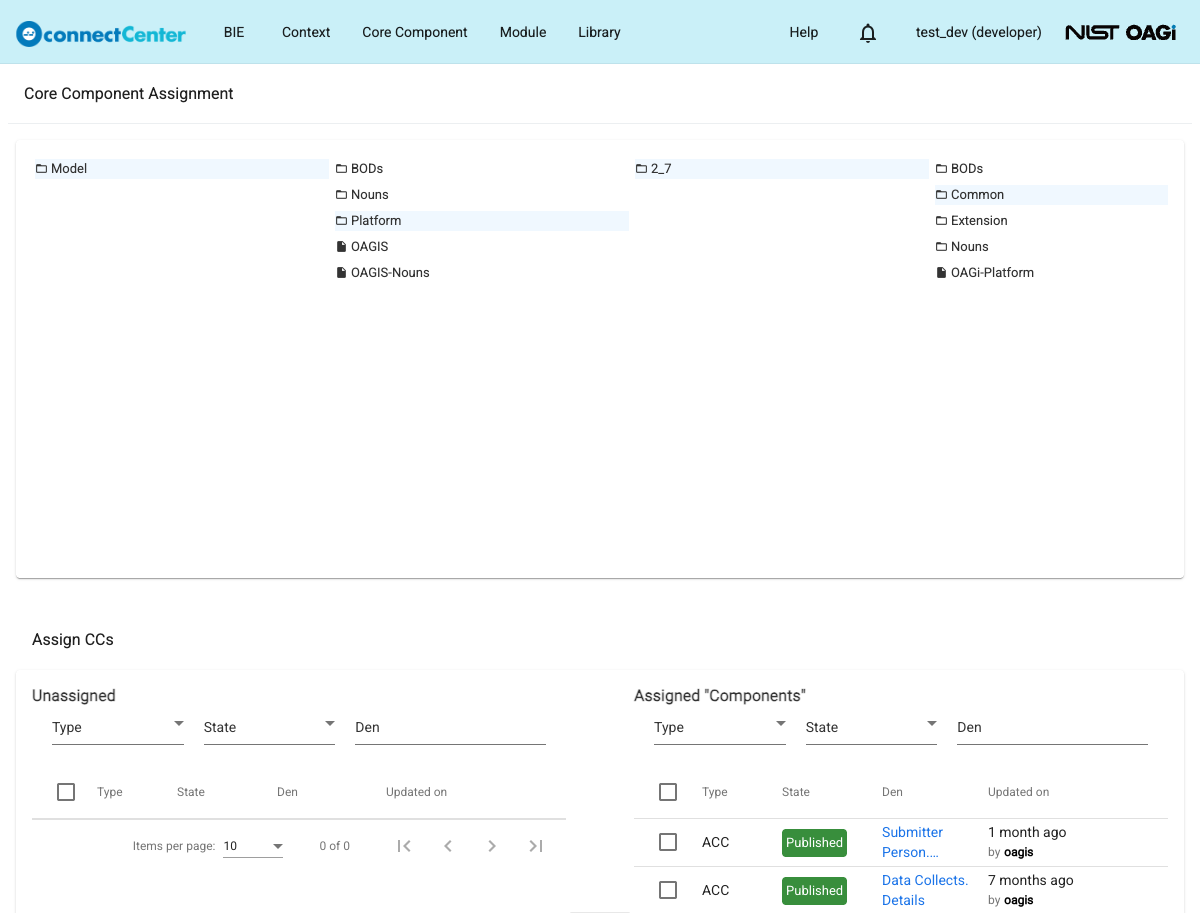
The "Core Component Assignment" page is returned. The area at the top of the page allows you to navigate through the module path, column by column, to reach the Module Files and Module Directories of the Module Set used in the Module Set Release. The "Assign CCs" area at the bottom of the page has two sections: the "Unassigned" section on the left lists the CCs in the Release (ACCs, ASCCPs, BCCPs, DTs, code lists, agency ID lists, and XML schema built-in types) that have not been assigned to any module yet, and the "Assigned" section on the right lists the CCs assigned to the currently selected Module File.
-
To assign a particular CC to a Module File:
-
In the module path area, navigate to the desired Module File and select it. The heading of the Assigned section shows the name of the selected Module File.
-
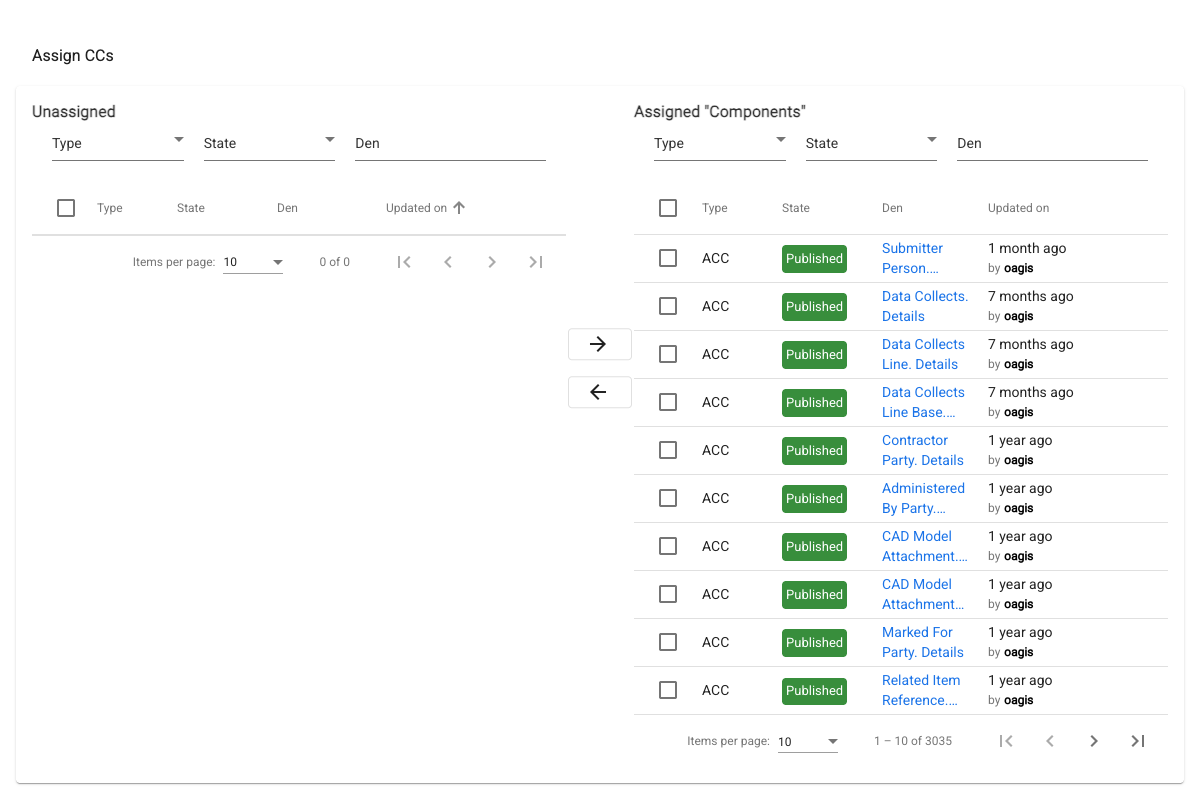
In the Unassigned section, find the CC you want to assign and click on its checkbox. You can select multiple CCs, and the checkbox in the table header selects all listed CCs. You can also use the "Type", "State", and "Den" filters at the top of the Unassigned section.
-
Click the right-arrow button (with the "Assign" tooltip) between the two sections. An "Assigned" message confirms the action, and the CCs are moved to the Assigned section.
-
Unassign a CC from a Module File
-
Open the "Core Component Assignment" page and select the desired Module File, as described in Assign CCs to a Module File.
-
In the Assigned section, find the CC you want to unassign from the selected Module File and click on its checkbox. You can select multiple CCs and use the "Type", "State", and "Den" filters at the top of the Assigned section.
-
Click the left-arrow button (with the "Unassign" tooltip) between the two sections. An "Unassigned" message confirms the action, and the CCs are moved back to the Unassigned section.
Validate a Module Set Release
Users can validate the schemas generated for the Module Set Release without downloading them. To validate:
-
Click the "Validate" button.
-
Choose either "XML Schema" or "JSON Schema" from the menu.
-
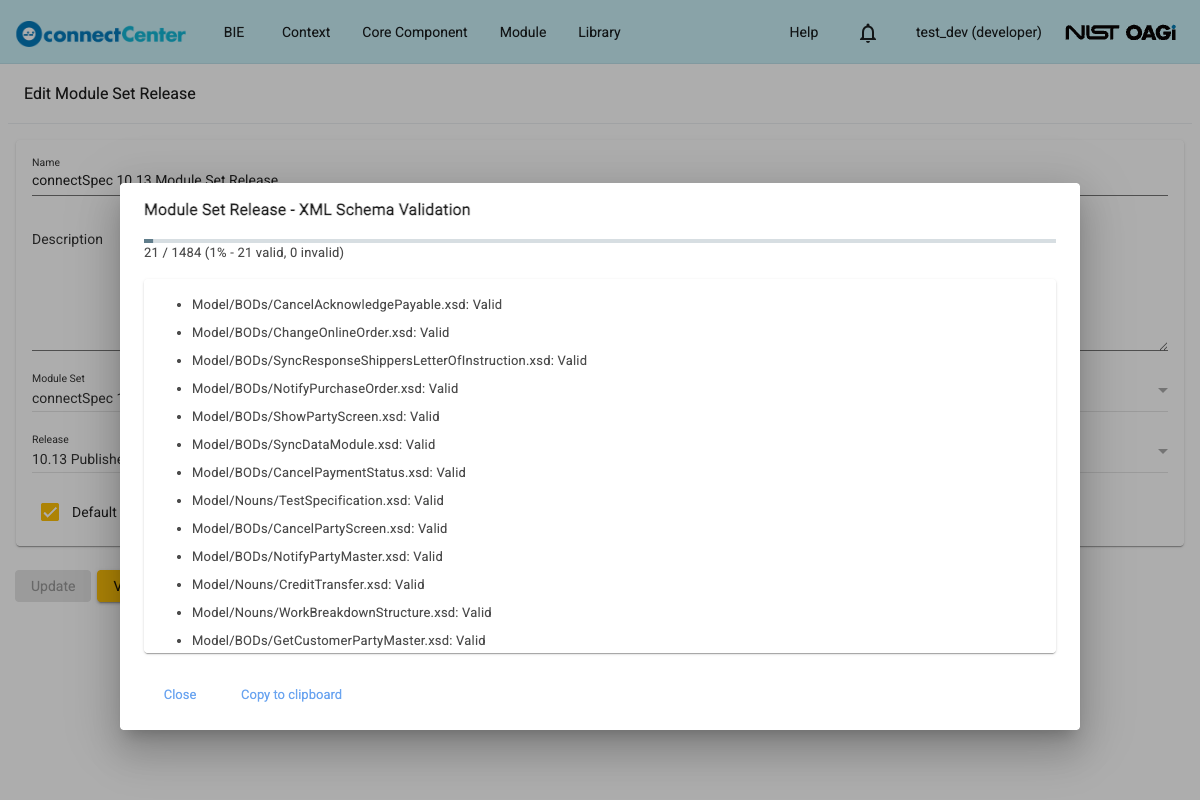
The validation dialog first reports that the schemas are being generated, and then shows a progress bar with the running counts of valid and invalid files while each generated file is validated. Invalid files are listed in bold at the top with their error messages, and "All schemas are valid." is reported on success. The "Close" and "Copy to clipboard" buttons become available when the validation is done.
Export a Module Set Release
This section describes how to export a Module Set Release as XML Schema or JSON Schema (draft 2020-12) files.
-
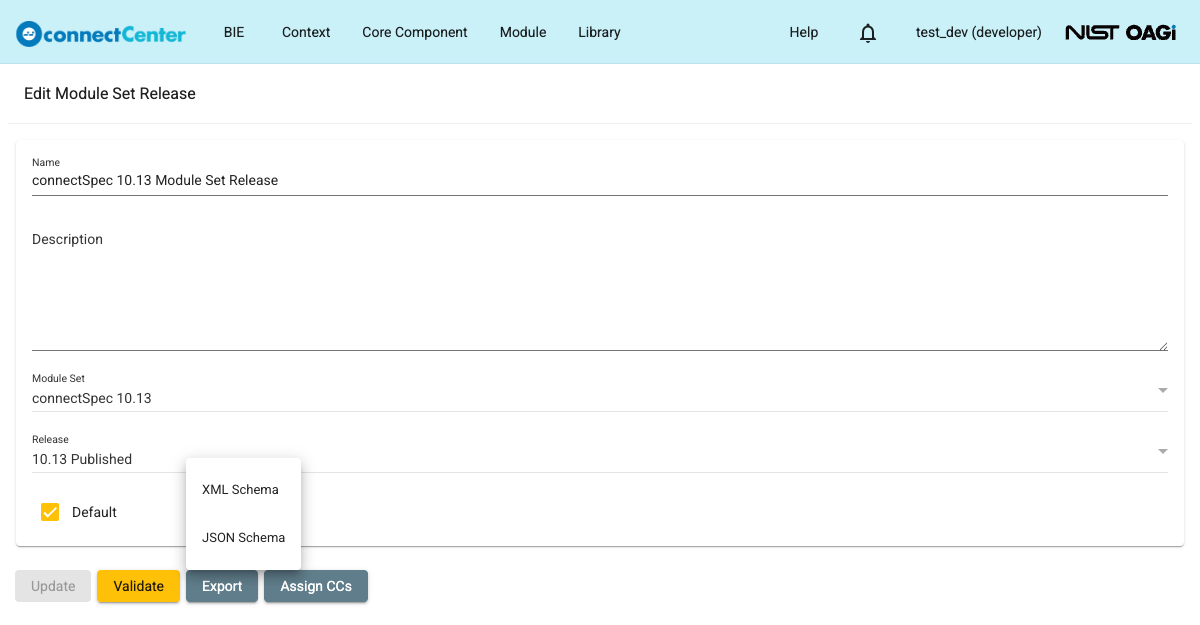
Click the "Export" button and choose either "XML Schema" or "JSON Schema" from the menu. If the Module Set Release is properly configured, a zip file containing the schema files, named after the Module Set, is downloaded by the browser.
Note that the process of exporting a Module Set Release will take some time; a spinner is shown while the file is being prepared.
Discard a Module Set Release
To discard a Module Set Release:
-
Go to the "Module Set Release" page by clicking the "View/Edit Module Set Release" menu item under the "Module" menu.
-
See Find a Module Set Release for help in locating a Module Set Release.
-
Click on the ellipsis in the last column of the desired Module Set Release and select the "Discard" menu item in the pop-up menu.
-
In the returned "Discard Module Set Release?" dialog, confirm your intention by clicking "Discard". All CC assignments within the Module Set Release will be lost. The Module Set itself and its modules are not affected.