Manage Module Set
The Module Set management functionality allows developers to create module sets and organize their module files and module directories.
Find a Module Set
To find a Module Set:
-
On the "Module" menu at the top, click the "View/Edit Module Set" menu item if you are a developer, or the "View Module Set" menu item if you are an end user.
-
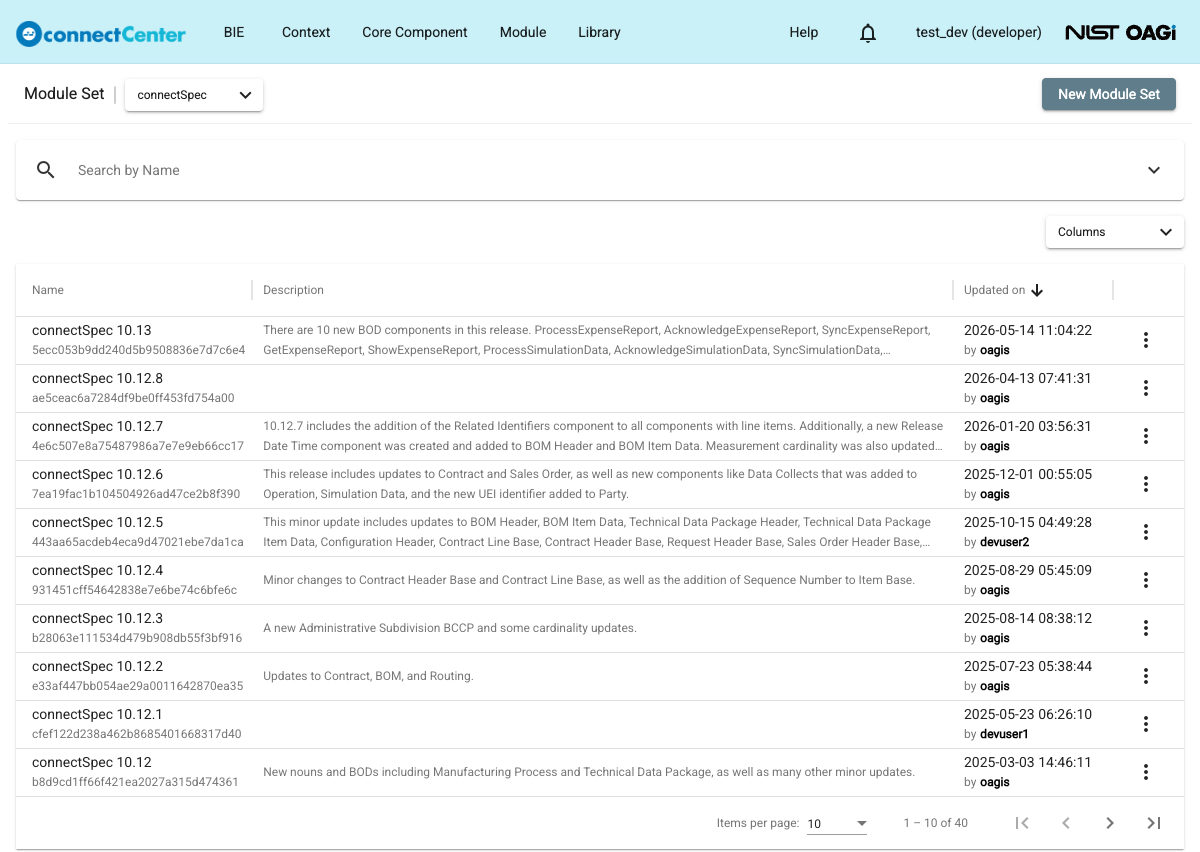
The "Module Set" page opens, listing the Module Sets of the library selected next to the page title.
-
Use the "Search by Name" bar at the top of the page to search for the desired Module Set. The chevron-down button at the right end of the search bar expands advanced filters: "Description", "Updater", "Updated start date", and "Updated end date". See also How to use Search Filters.

-
Click on any column header to sort the Module Sets. The GUID of each Module Set is displayed under its name.
View detail of a Module Set
-
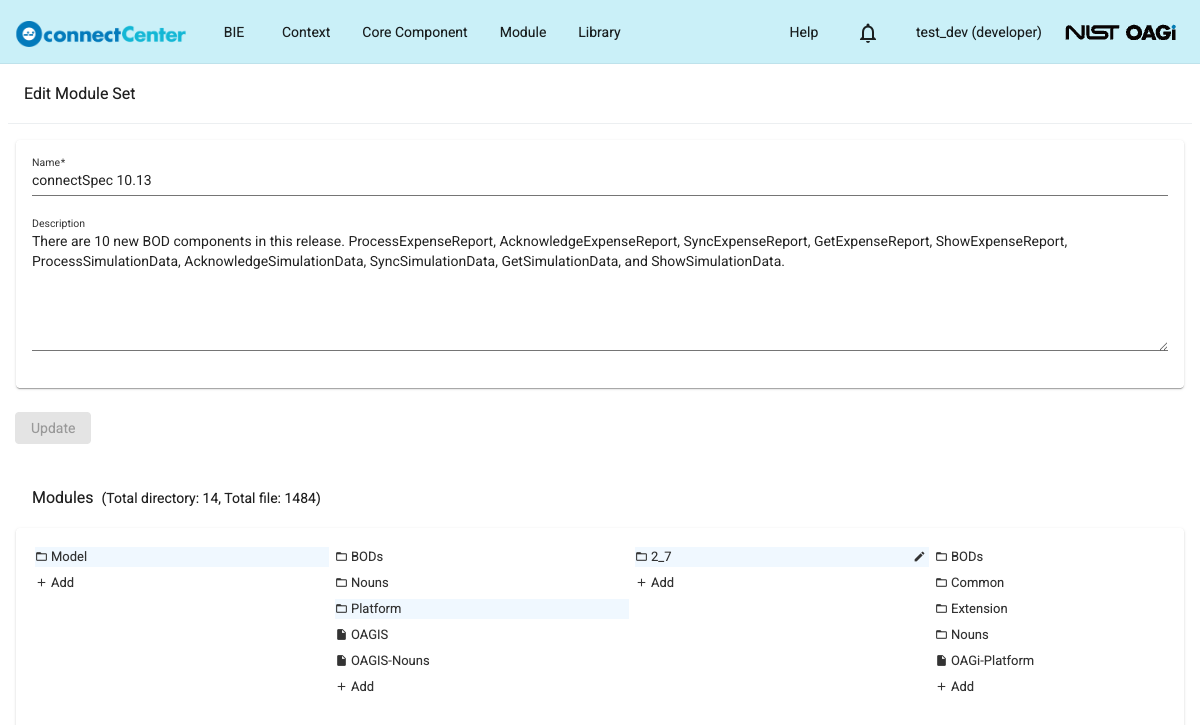
Click on the name of the Module Set to open the "Edit Module Set" page (titled "View Module Set" for end users, with all editing controls hidden or disabled).
Create a new Module Set
To create a Module Set:
-
Go to the "Module Set" page by clicking the "View/Edit Module Set" menu item under the "Module" menu.
-
Click the "New Module Set" button. The button is shown only to developers and only when a library is selected.
-
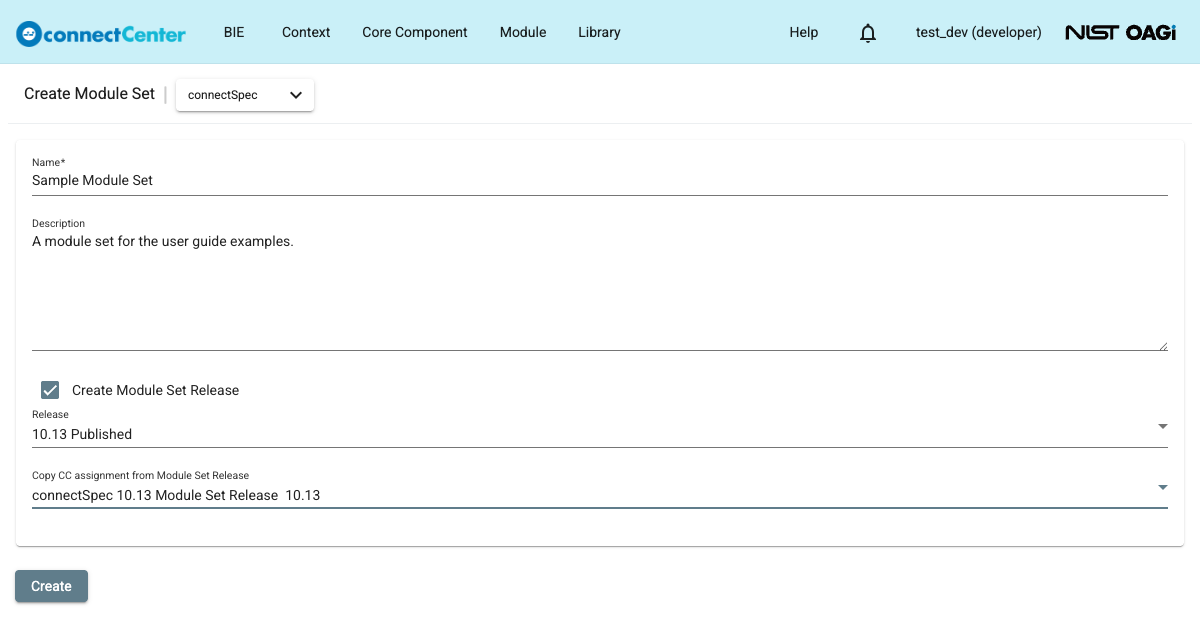
In the returned "Create Module Set" page:
-
Name. Specify the name of the Module Set. The "Name" field is a free form text. This field is mandatory.
-
Description. Specify the description of the Module Set. The "Description" field is a free form text. This field is optional.
-
Create Module Set Release. This checkbox allows for creating a Module Set Release together with the new Module Set. This checkbox is optional. However, if it is checked, both of the following fields must also be set before the "Create" button is enabled:
-
Release. Select the Release that you want to use in the new Module Set Release from the dropdown list. The dropdown offers the releases of the library in any state, including the "Working" branch.
-
Copy CC assignment from Module Set Release. Select the source Module Set Release from the dropdown list. connectCenter copies the module directories and module files of the source Module Set into the new Module Set and copies the CC assignments of the source Module Set Release to the new Module Set Release, matching the CCs across the releases by their GUID and the modules by their path.
-
-
-
Click "Create". A "Created" message confirms the creation and the Module Set list page is reloaded.
It should be noted that a Module Set Release can also be created later on, where copying the CC assignments is optional.
Edit detail of a Module Set
-
-
In the top panel of the page, the detail of the Module Set can be edited as follows:
-
Name. Specify the name of the Module Set. The "Name" field is a free form text. This field is mandatory.
-
Description. Specify the description of the Module Set. The "Description" field is a free form text. This field is optional.
-
Click "Update" to save the changes. The button stays disabled until a change is made. An "Updated" message confirms the save.
-
-
In the "Modules" section at the bottom of the page (the heading also shows the total number of directories and files), you can:
Add a Module File or Module Directory
To add a Module to a Module Set you should be on the page where you edit detail of a Module Set. A Module File or a Module Directory can be added to a Module Directory, creating a hierarchical file and directory structure.
This hierarchical structure is displayed in the "Modules" section at the bottom of the page via different columns. The first column at the left side is the root. Clicking a Module Directory opens its content in a new column on its right.
-
A Module Directory or Module File can be added in the first column or in any other column that corresponds to a Module Directory. To do so, click "+ Add" located at the end of the desired column.
-
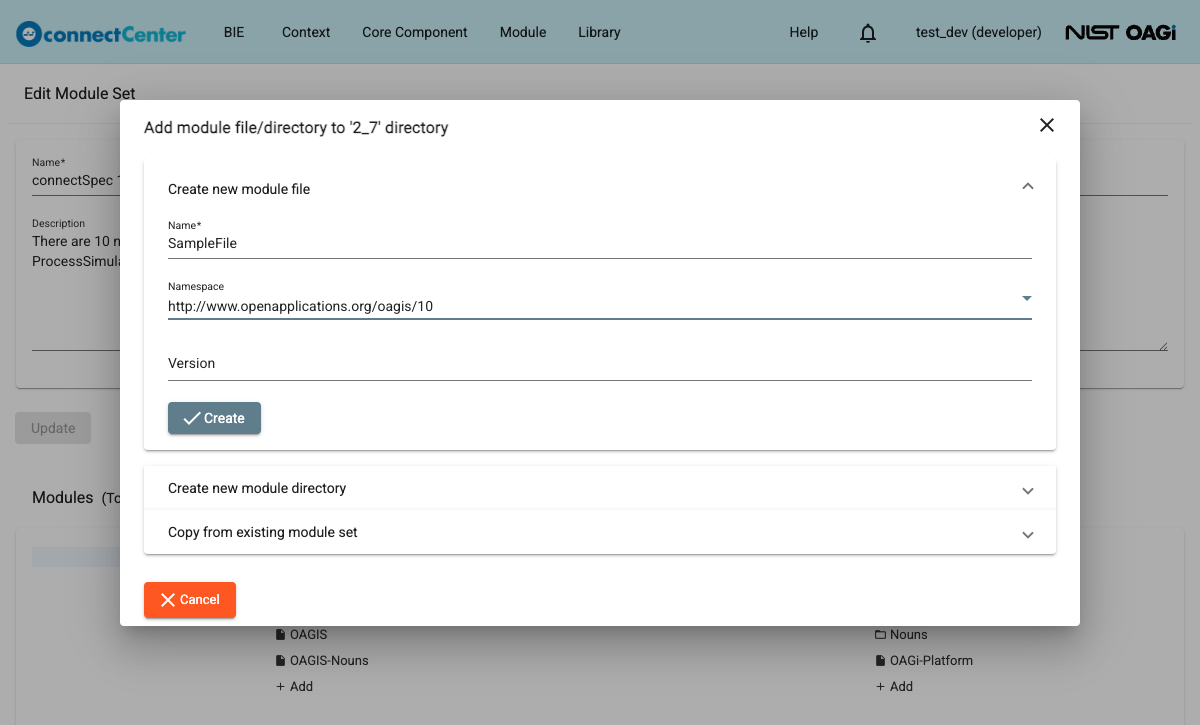
The "Add module file/directory to '...' directory" dialog pops up with three expandable options:
-
Create new module file. Click on this option to create a new Module File within the column. The following fields can be edited:
-
Name. This is a freeform text field that specifies the name of the file, without an extension. It is mandatory and its value should be unique within the column; a duplicate is rejected with the "Duplicate module name exist." error.
-
Namespace. Choose the namespace of the Module from the dropdown list. Only developer Namespaces can be selected. It may be used in certain expressions. This field is optional.
-
Version. This field is a freeform text representing the version of the Module. It is serialized as the version attribute of the file in the XML Schema expression. This field is optional.
Click the "Create" button inside the section to add the file.
-
-
Create new module directory. Click on this option to create a new Module Directory within the column. In the Name field, specify the directory name. It is a freeform text and is mandatory. The name of a Module Directory should be unique within the column. Click the "Create" button inside the section.
-
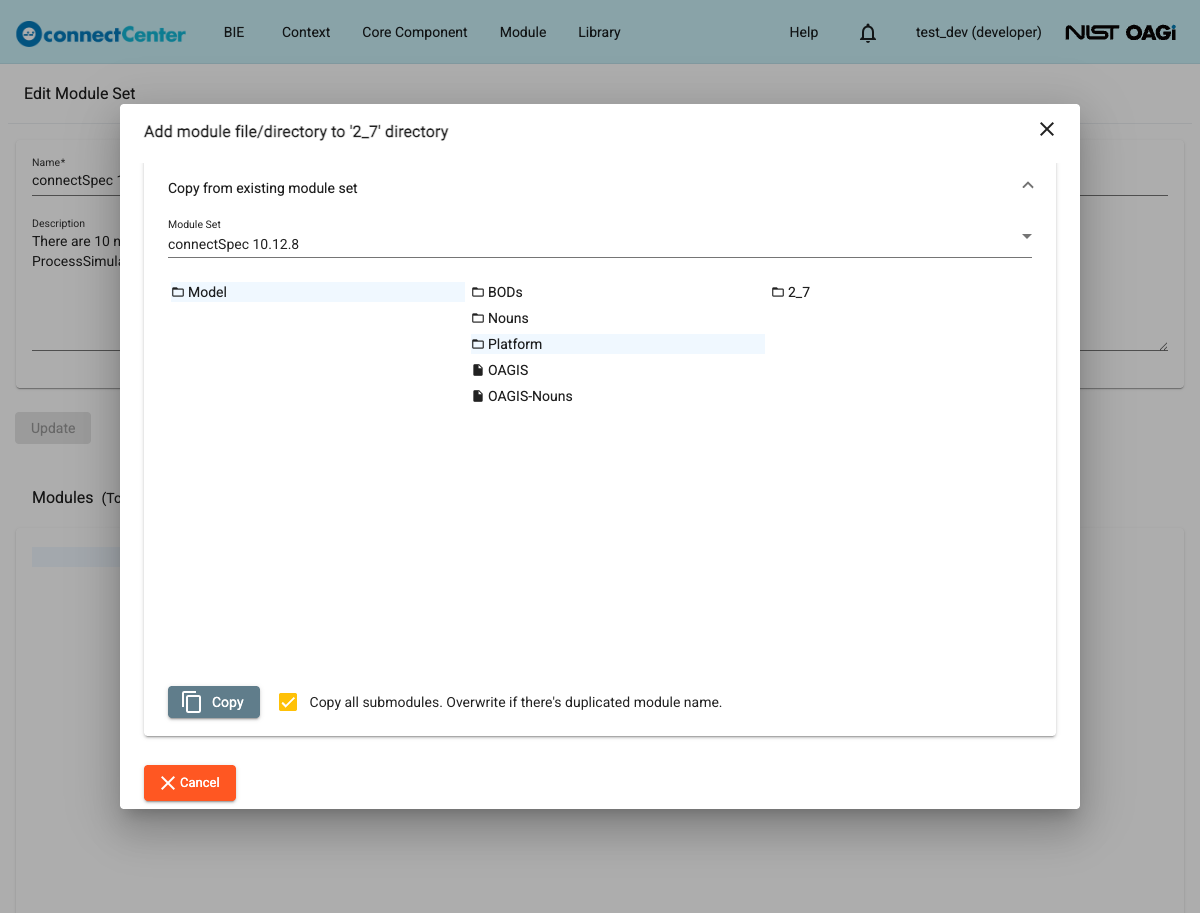
Copy from existing module set. This option copies the selected Module Files and Module Directories from an existing Module Set to the current Module Set:
-
From the "Module Set" dropdown list, select the existing Module Set from which you want to copy.
-
The hierarchical structure of the Modules of the selected Module Set is shown in the same column-by-column form as on the main page. Navigate through the Module Directories, select the Module File or Module Directory you want to copy, and click "Copy".
-
The "Copy all submodules. Overwrite if there's duplicated module name." checkbox next to the "Copy" button is checked by default. When it is checked and a Module Directory is selected, connectCenter also copies all of its submodules; a copied Module that already exists in the target column overwrites the existing one instead of being added twice.
-
-
-
A "Created" (or "Copied") message confirms the action.
Edit detail of a Module File
To edit detail of a Module File:
-
Mouse over the Module File and click on the pencil icon that appears next to it.
-
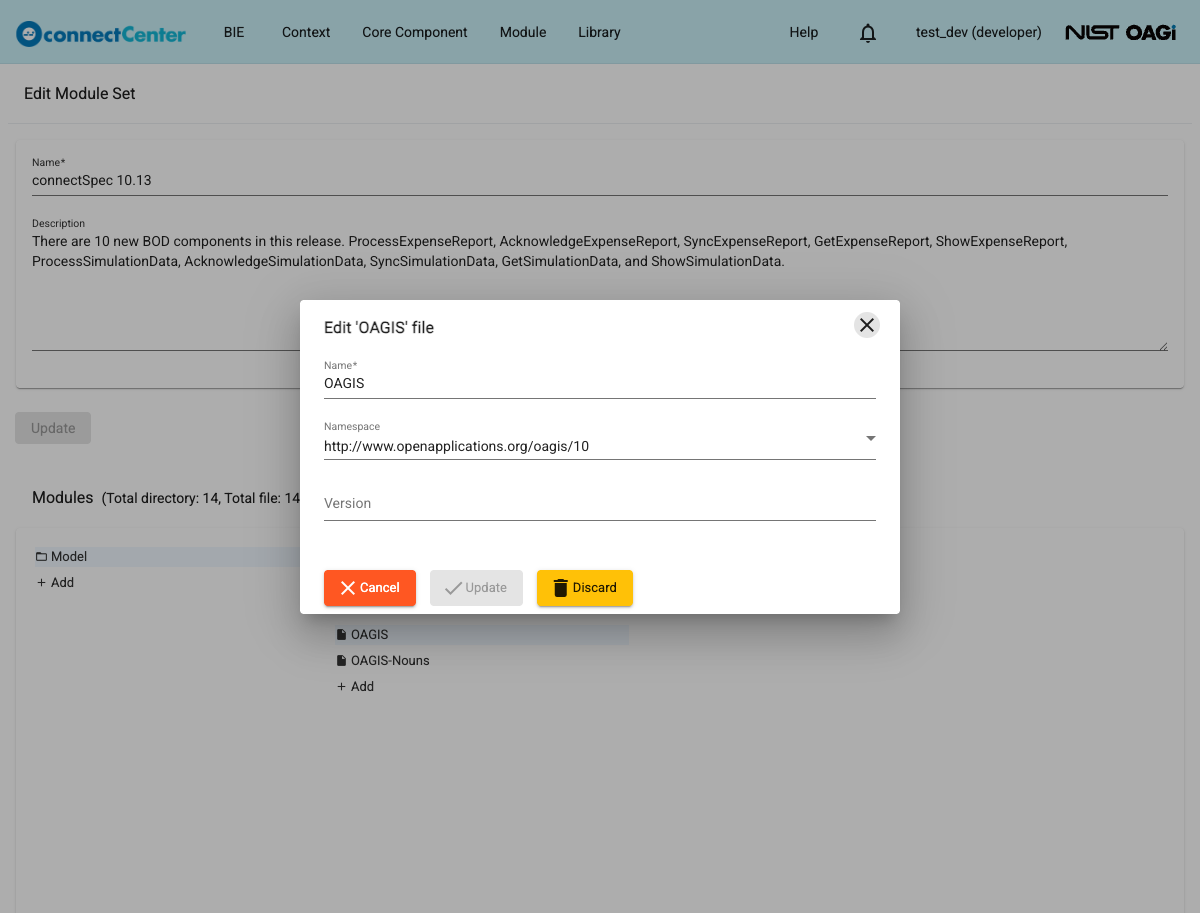
In the returned "Edit '...' file" dialog, you can edit:
-
Name. This is a freeform text field that allows for specifying the name of the Module. It is mandatory and its value should be unique within the module path (i.e., the Module Directory and column).
-
Namespace. Choose the namespace of the Module from the dropdown list. Only developer Namespaces can be selected. This field is optional.
-
Version. This field is a freeform text representing the version of the Module. This field is optional.
-
-
Click "Update" to store the changes. The button stays disabled until a field is actually changed.
Edit detail of a Module Directory
To edit detail of a Module Directory:
-
Mouse over the Module Directory and click on the pencil icon that appears next to it.
-
In the returned "Edit '...' directory" dialog, edit the Name field. This is a freeform text field for the directory name. It is mandatory and its value should be unique within the module path (i.e., the column). Renaming a directory updates the path of all Modules under it.
-
Click "Update" to save the change.
Discard a Module File or Module Directory
To discard a Module File or Module Directory:
-
Mouse over the Module File or Module Directory and click on the pencil icon next to it.
-
In the returned dialog, click the "Discard" button.
-
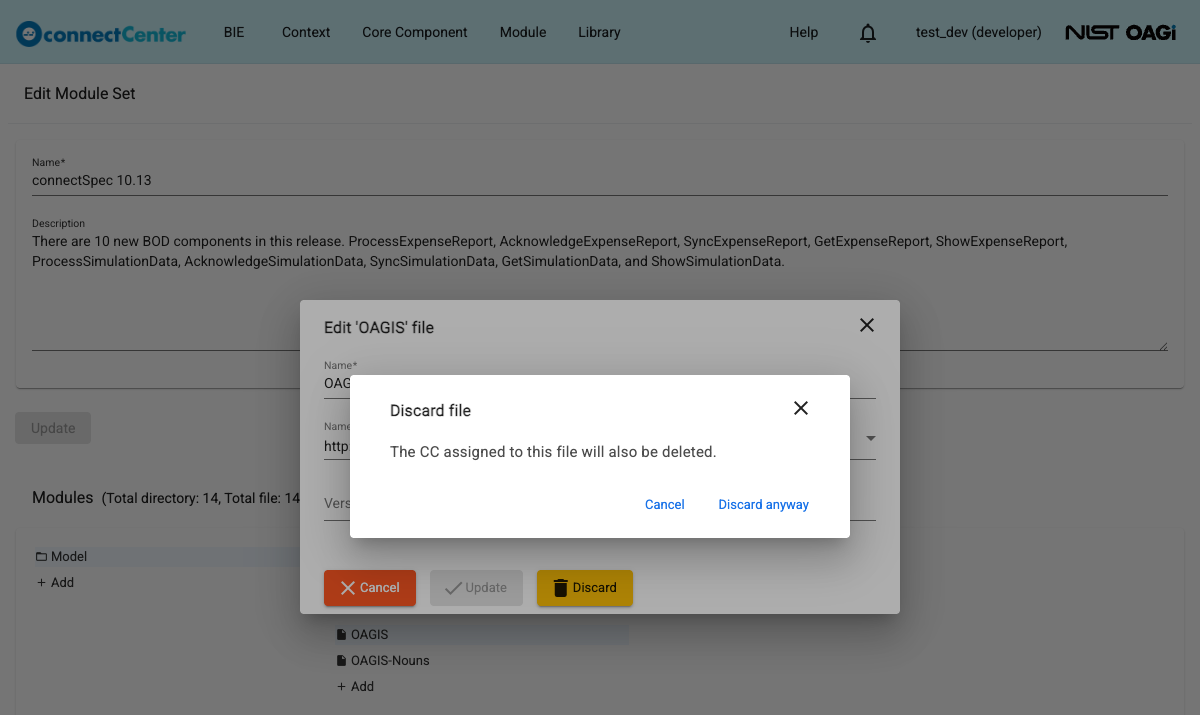
Confirm your intention in the returned dialog by clicking "Discard anyway"; or click "Cancel" to go back.
-
For a Module File, the dialog warns "The CC assigned to this file will also be deleted." - discarding the file removes its CC assignments from every Module Set Release that uses the Module Set.
-
For a Module Directory, the dialog asks "Are you sure you want to discard this and sub modules?" - discarding a directory also discards all Module Files and Module Directories under it, together with their CC assignments.
-
Discard a Module Set
A Module Set can be discarded only if it is not assigned to any Module Set Release; otherwise, the discard fails with the "Module set in use cannot be discarded." error.
To discard a Module Set:
-
Go to the "Module Set" page by clicking the "View/Edit Module Set" menu item under the "Module" menu.
-
See Find a Module Set for help in locating a Module Set.
-
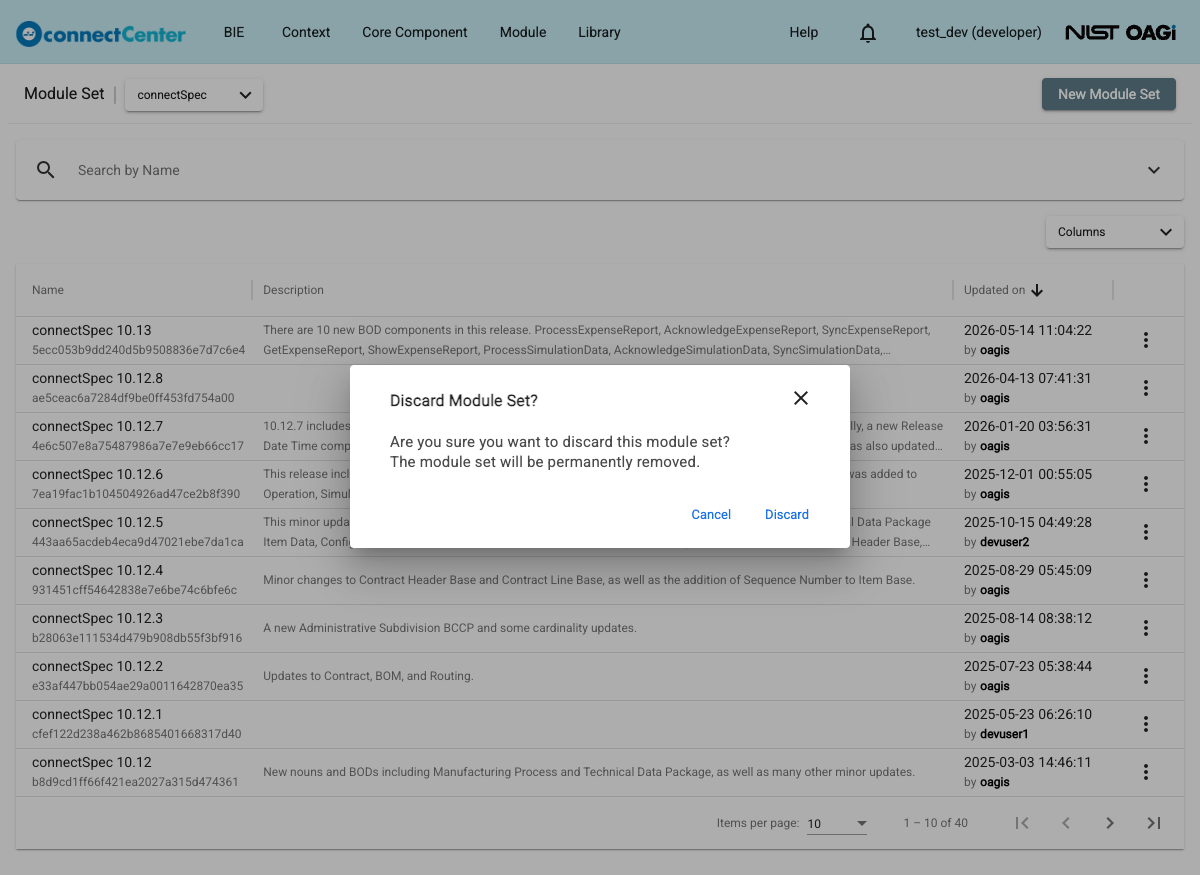
Click on the ellipsis in the last column of the desired Module Set and select the "Discard" menu item in the pop-up menu.
-
In the returned "Discard Module Set?" dialog, confirm your intention to discard the Module Set by clicking "Discard". All modules of the Module Set are permanently removed with it.