Common Developer CC Management Functions
The user guide in this section commonly applies to BCCP, ASCCP, and ACC. The same buttons and steps also apply to DTs, code lists, and Agency ID Lists, except that those are found on their own pages ("View/Edit Data Type", "View/Edit Code List", and "View/Edit Agency ID List" under the "Core Component" menu) instead of the "Core Component" page.
Delete a newly created CC
A CC with revision #1 can be deleted. Doing so will put the CC into the Deleted state. This signifies that the owner of the deleted CC does not want to use it anymore. It suggests that if the CC is used by another developer, he/she should consider using another CC. It is recommended that the owner documents the reason for deletion in the "Definition" field before deleting. Other developers (or the owner himself) can however restore the CC - See Restore a deleted CC. To delete a CC:
-
Go to the "Core Component" page by clicking the "View/Edit Core Component" menu item under the "Core Component" menu. Find one or more CCs to delete. See Search and Browse CC Library for help in locating a CC.
-
There are two ways to delete a CC:
-
Delete one or more CCs simultaneously.
-
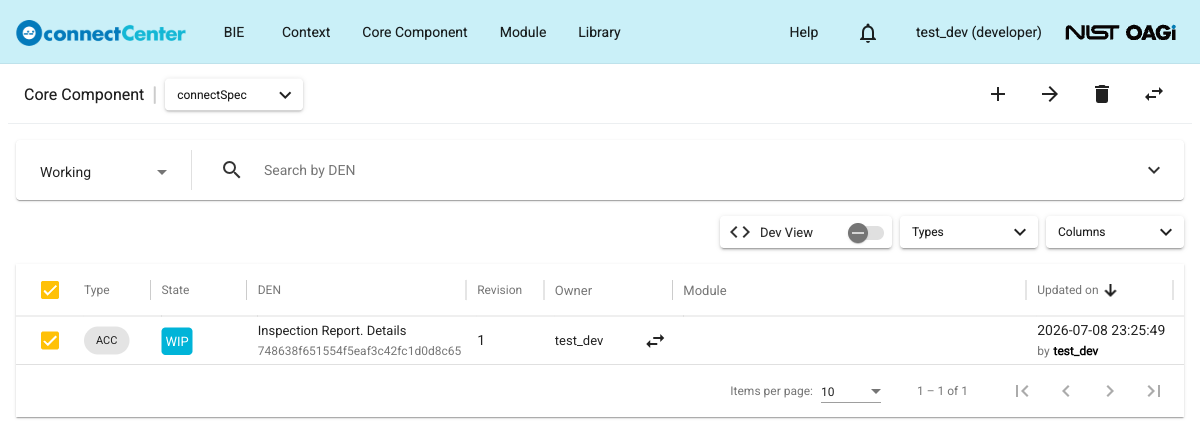
Check the checkbox in front of one or more CCs that are in the WIP state, have revision 1, and are owned by the current developer.
-
A trash icon (tooltip "Delete") is displayed at the top-right corner of the page.
-
Click the trash icon.
-
-
Delete a CC individually:
-
Click on the DEN of the CC to open its detail page. The CC must be in the WIP state, has revision 1, and is owned by the current developer.
-
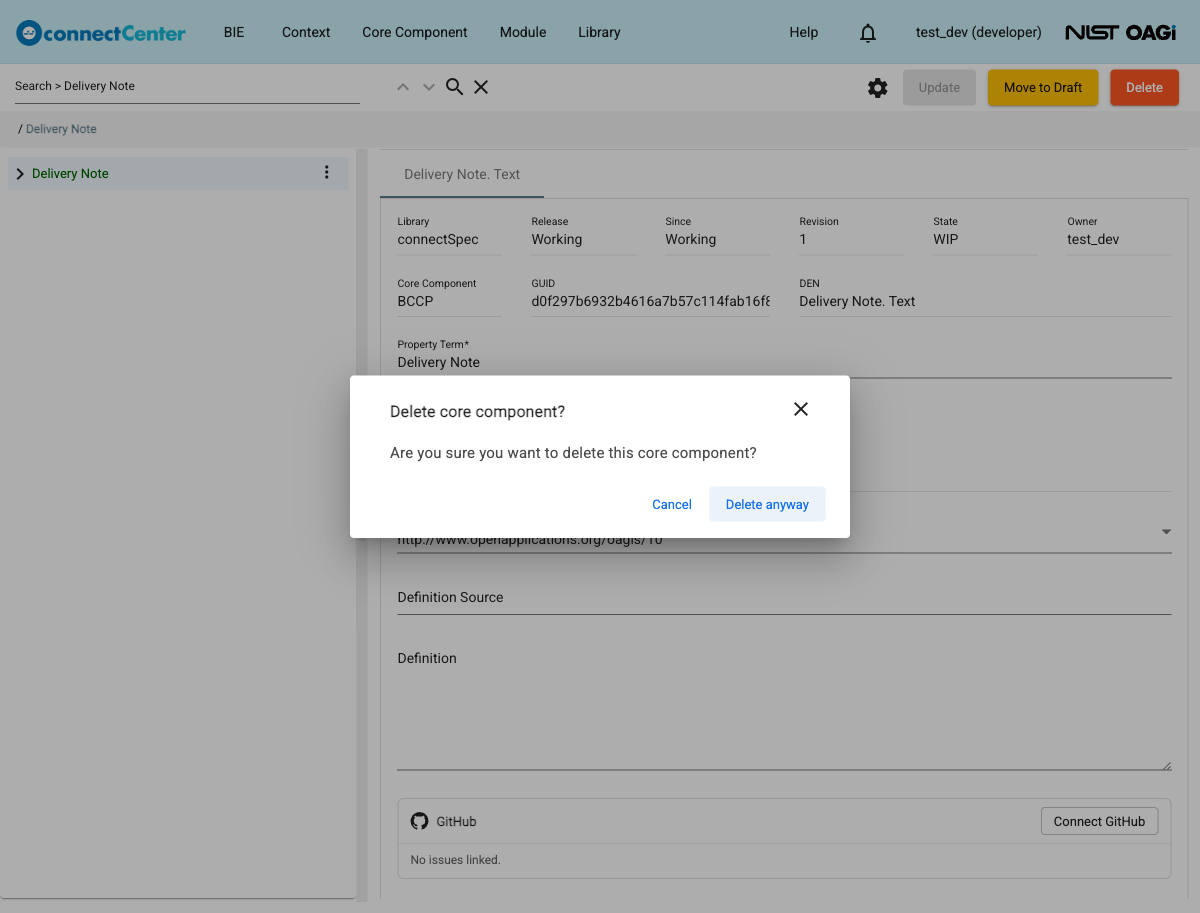
Click the "Delete" button at the top-right corner.
-
-
-
Confirm (or cancel) the deletion in the confirmation dialog; on a detail page the dialog is titled "Delete core component?" and the confirm button is "Delete anyway".
Restore a deleted CC
Once a CC has been deleted, the ownership is relinquished from the current owner. Any other developer can restore the CC to the WIP state and take the ownership. To restore a CC:
-
Go to the "Core Component" page by clicking the "View/Edit Core Component" menu item under the "Core Component" menu. Find one or more CCs to restore from deletion. See Search and Browse CC Library for help in locating a CC. There are two ways to restore a CC.
-
Restore one or more CCs simultaneously:
-
Check the checkbox in front of the CCs that are in the Deleted state.
-
A trash can with an arrow icon (tooltip "Restore") is displayed at the top-right corner of the page.
-
Click the icon.
-
-
Restore a CC individually:
-
Click on the DEN of a deleted CC to open its detail page.
-
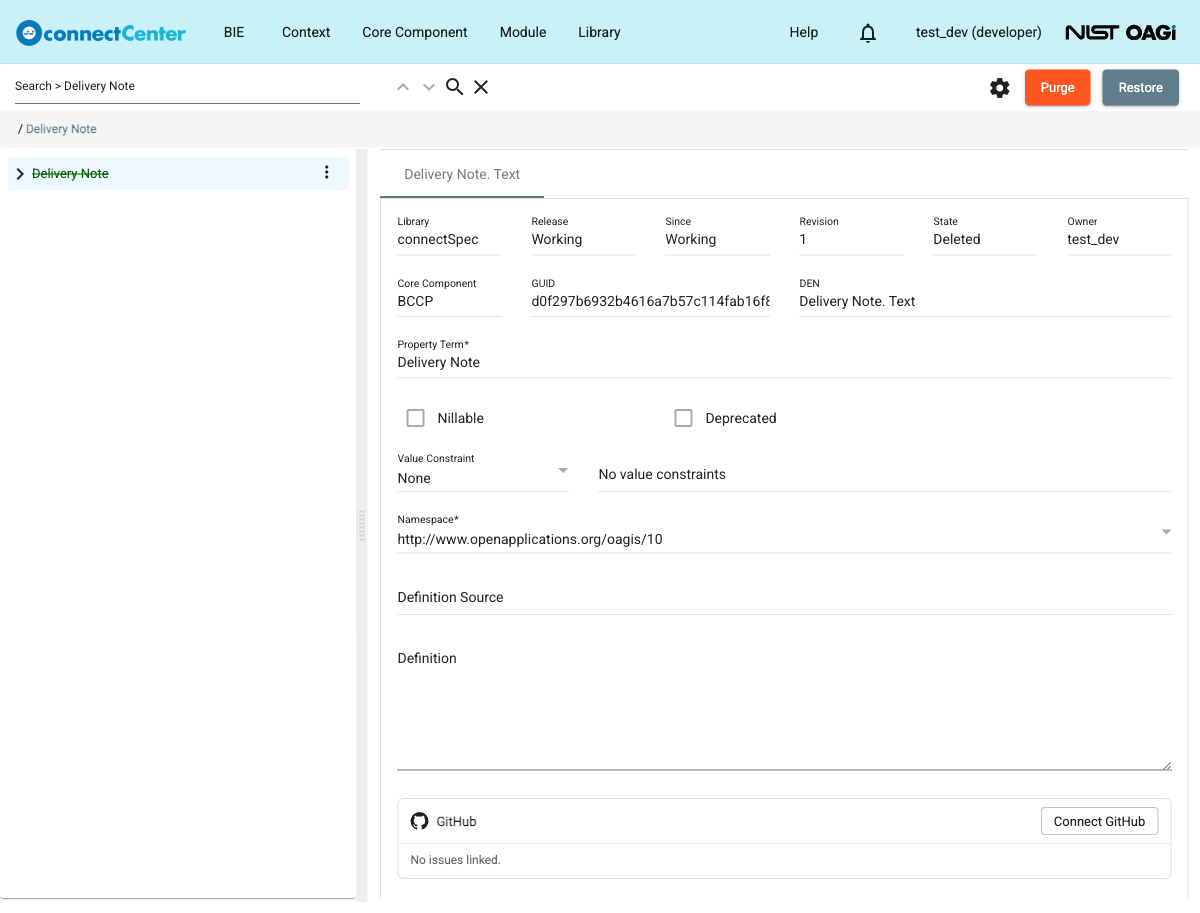
Click the "Restore" button at the top-right corner of the page.
-
-
-
Confirm (or cancel) the restoration on the pop-up dialog.
Cancel a CC revision
The developer who is the owner of a CC being revised can cancel the revision. In this case, all changes to the CC are discarded. CC detail and its owner are rolled back to the pre-revised state. To cancel a CC revision:
-
Go to the "Core Component" page by clicking the "View/Edit Core Component" menu item under the "Core Component" menu. Find the CC to cancel its revision. See Search and Browse CC Library for help in locating a CC.
-
Click on the DEN of the CC to open its detail page. The current user has to be the owner of the CC and the CC has to be in the WIP state with revision number greater than 1.
-
Click the "Cancel" button at the top-right of the page.
-
Confirm (or cancel) the revision cancellation in the "Cancel this revision?" dialog. Note that all work done in the revision will be permanently removed and cannot be recovered.
Change a CC state
The section covers the toggling between WIP, Draft, and Candidate CC states. For detailed meaning of these and other states, see CC States. The current user has to be the owner of the CC to toggle between these three states. To change the CC state:
-
Go to the "Core Component" page by clicking the "View/Edit Core Component" menu item under the "Core Component" menu. Find one or more CCs to change the state. See Search and Browse CC Library for help in locating a CC.
-
There are two ways to change state of a CC:
-
Change the state of one or more CCs in one shot.
-
Check the checkbox in front of one or more CCs that are in the same state and owned by the current developer. (Retracting to WIP also works for a mixed selection of Draft and Candidate CCs.)
-
Arrow icons are displayed at the top-right corner of the page. Depending on the current state of the selected CCs; left, right, or both arrow icons are displayed (tooltips "Move to Draft", "Move to Candidate", or "Back to WIP").
-
Click the left arrow icon to retract the state or click the right arrow icon to advance the state.
-
-
Change the state of a CC individually:
-
Open the CC detail page by clicking the DEN of the CC in WIP, Draft, or Candidate state that is owned by the current developer.
-
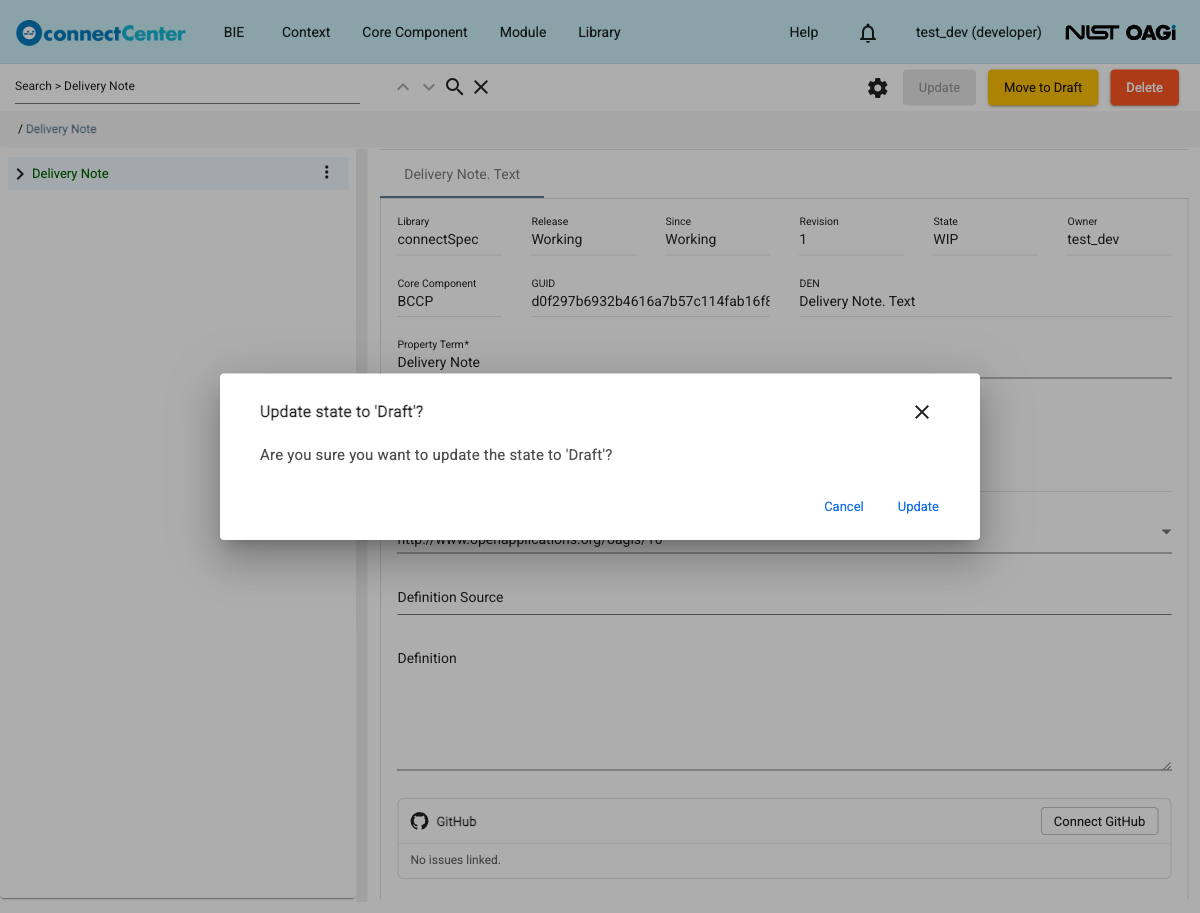
Depending on the current state of the CC, click either the "Move to Draft", "Move to Candidate", or "Back to WIP" button at the top-right corner of the page.
-
-
-
Confirm (or cancel) the state change in the "Update state to '...'?" dialog.
A CC must have its "Namespace" field set before it can be moved out of the WIP state; the bulk action rejects the move with the message "Namespace is required for all selected components before moving to Draft/QA.", and the detail page reports "Namespace is required".
Transfer ownership of a CC
To let another developer make changes to a CC, the current owner has to transfer ownership of the CC to another developer. A developer CC can be transferred only to another developer, and only while it is in the WIP state. To transfer ownership:
-
Go to the "Core Component" page by clicking the "View/Edit Core Component" menu item under the "Core Component" menu. Find one or more CCs to transfer ownership. See Search and Browse CC Library for help in locating a CC.
-
There are two ways to transfer ownership of a CC:
-
Transfer ownership of one or more CCs simultaneously.
-
Check the checkbox in front of one or more CCs that are owned by the current developer and are in the WIP state.
-
The double-arrow icon (tooltip "Transfer Ownership") is displayed at the top-right corner of the page.
-
Click the double-arrow icon.
-
-
Transfer ownership of a CC individually:
-
On the "Core Component" page, when a CC is in the WIP state and is owned by the current developer, there is a double-arrow icon next to the username of the owner.
-
Click the double-arrow icon.
-
-
-
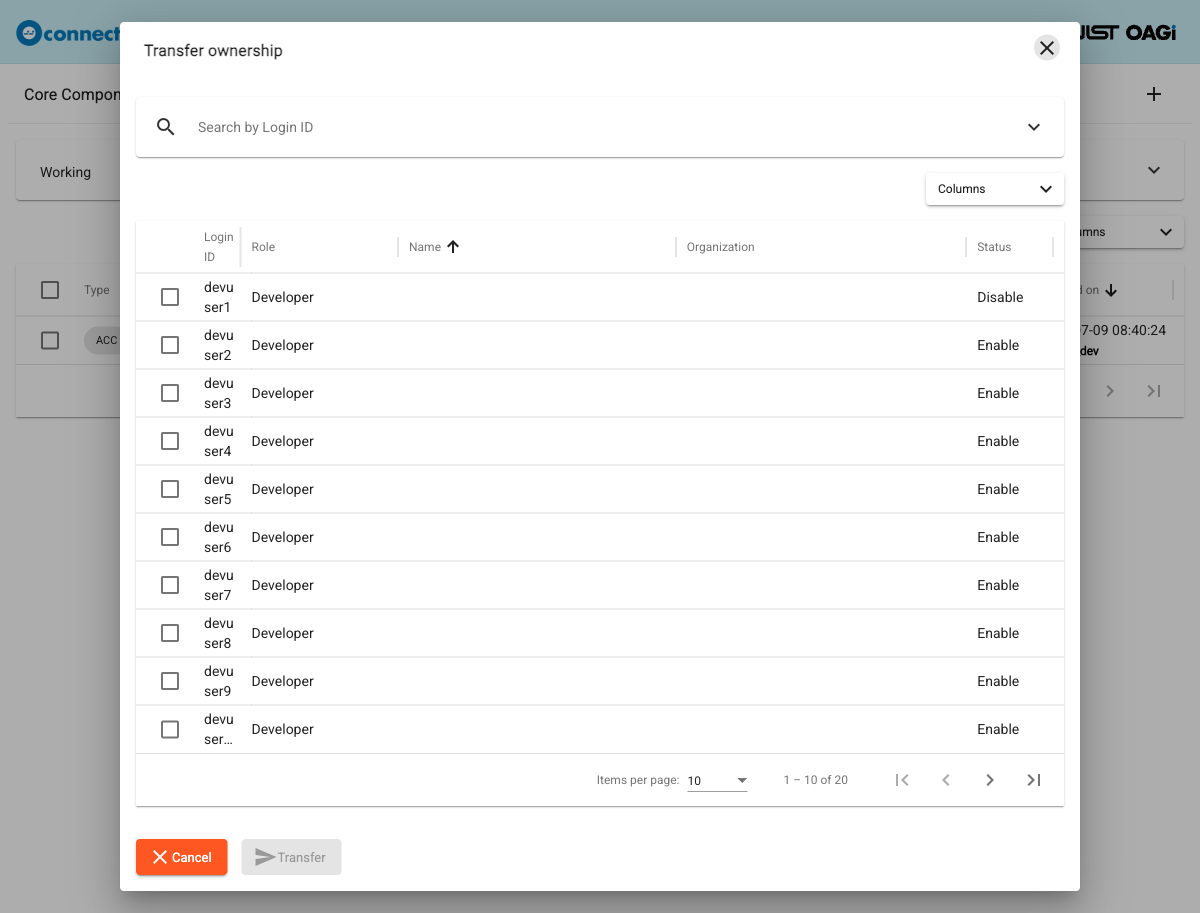
The "Transfer ownership" dialog is displayed to select a developer. Use the filter on the top to find the desired developer and check the checkbox in front of it.
-
Click the "Transfer" button.
View Change History of a CC
-
On any CC detail page, click on the ellipsis of a node in the CC tree in the left pane. Select the "Show History" menu item.
-
A new browser tab is opened showing the list of changes that have occurred.
-
Check any two checkboxes in the list. The "Compare" button is activated.
-
Click the "Compare" button.
-
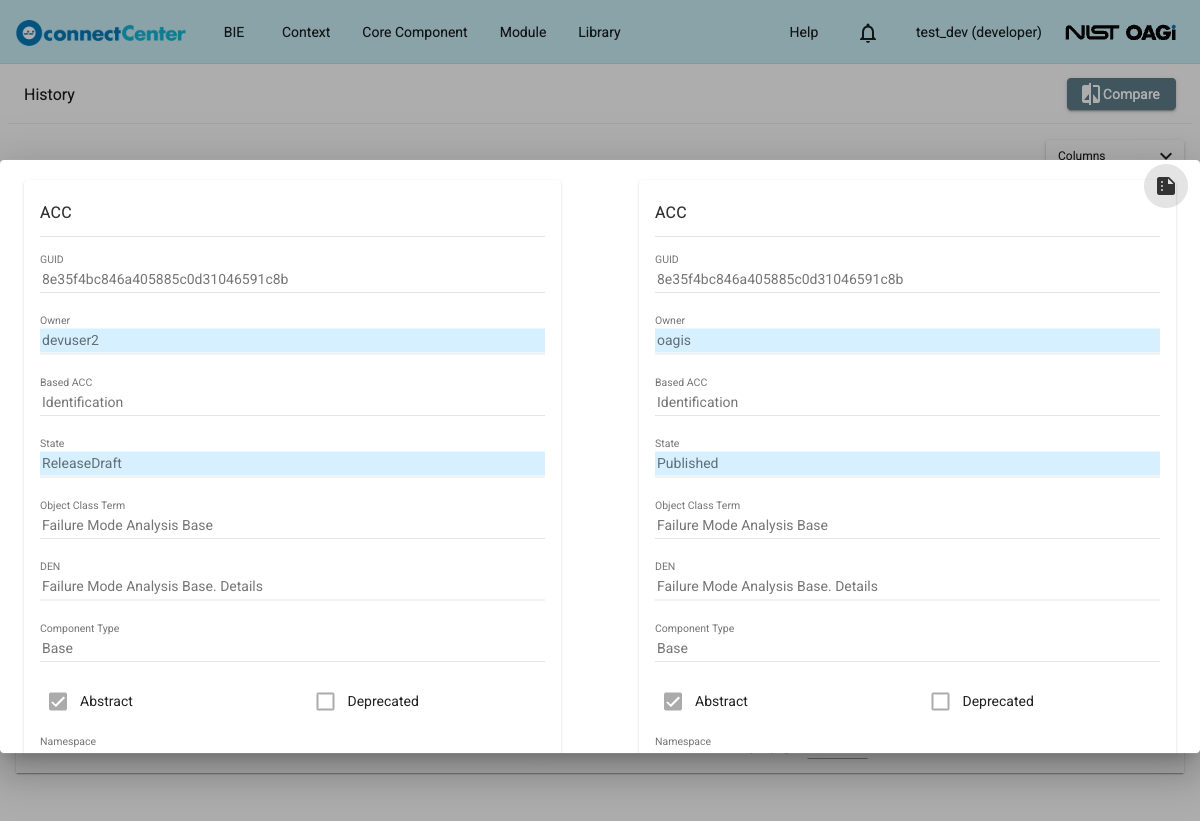
A diff dialog is open. The older copy is shown on the left and the newer one is shown on the right. Fields that were changed are highlighted in blue. Things that were newly added are highlighted in green.
-
Click anywhere outside the dialog or hit the Esc key to close the diff dialog.
Purge a CC
Purge allows for permanently discarding CCs, Code Lists and Agency ID Lists from connectCenter. Such entities along with their logs can never be restored back, and their comments become permanently inaccessible.
Any developer can purge any developer CC providing that it is in the Deleted state - see Delete a newly created CC. However, if the CC is still referenced by an association of another CC (as a property, base, or role of an ASCCP), it cannot be purged. For instance, a deleted BCCP that is still used as a property of an ACC can only be purged after the referencing ACC is purged (or by purging both together in one bulk purge).
-
Go to the "Core Component" page by clicking the "View/Edit Core Component" menu item under the "Core Component" menu. Find one or more CCs to purge. See Search and Browse CC Library for help in locating a CC.
-
There are two ways to purge a CC:
-
Purge one or more CCs simultaneously.
-
Check the checkbox in front of one or more CCs that are in the Deleted state.
-
A trash icon with a "Purge" tooltip is displayed at the top-right corner of the page.
-
Click this trash icon.
-
-
Purge a CC individually:
-
Click on the DEN of the CC to open its detail page. The CC must be in the Deleted state.
-
Click the "Purge" button at the top-right corner.
-
-
-
A confirmation dialog is displayed. Confirm or cancel the purge request.
Tagging CCs
The tagging feature in connectCenter allows users to label and categorize core components for better management. With this feature, users can assign custom tags to core components making it easier to locate and work with them later. To label the tag to core components:
-
Click on the ellipsis of a node in the CC tree located in the left pane on any CC detail page.
-
Next, select the "Tags" option from the menu that appears.
-
To apply a tag to the core component, choose the desired tag from the list of available tags in the submenu; choosing an applied tag again removes it.
-
To add a new tag, first click on the "Edit Tags" menu item. Then, scroll down to the bottom of the dialog box. Next, fill out the "Name", "Text Color", and "Background Color" fields for the new tag, and optionally the "Description" field. Finally, click on the "Add" button to create the new tag.
-
To edit existing tags, click on the "Edit Tags" menu item. Then, update the "Name", "Text Color", "Background Color", and "Description" fields of the tag. Finally, click on the "Update" button to save the changes.
-
To discard existing tags, click on the "Edit Tags" menu item and then click on the "Discard" button located below the tag properties. Note that deleting a tag removes it from all components across releases.
-
Export ASCCPs
"Export ASCCPs" allows users to download the schema expression of the selected ASCCP(s) as either XML Schema or JSON Schema. To export ASCCPs:
-
Select the ASCCP(s) in the list by clicking the checkbox(es). The export icon button will appear at the upper right hand corner of the screen.
-
Click the export icon button.
-
Choose either "XML Schema" or "JSON Schema" from the menu.