Using Single Sign-On (SSO)
Overview
connectCenter supports the integration of external accounts managed by third-party identity providers (IdPs) compliant with the OpenID Connect Specification. If your system administrator has configured SSO when installing connectCenter, the sign-in page shows a "Sign in with ..." button for each enabled identity provider, and this feature allows the OpenID Connect account to link to a connectCenter account.
Connect external accounts to connectCenter
To connect external IdP accounts to connectCenter, the user must first try to sign in to connectCenter using the IdP account. When connectCenter does not have a record of the IdP account, it places the account in the pending state: the user lands on an "Account Pending" page and cannot use connectCenter until the request is processed, while all users with the Admin right receive an in-app notification about the new pending request. Users with the Admin right can review these pending accounts from "Admin" > "Pending SSO". The admin can then do one of the following:
-
Create a new local account from the pending SSO profile.
-
Link the SSO profile to an existing connectCenter account.
-
Reject the pending request.
Review pending SSO requests
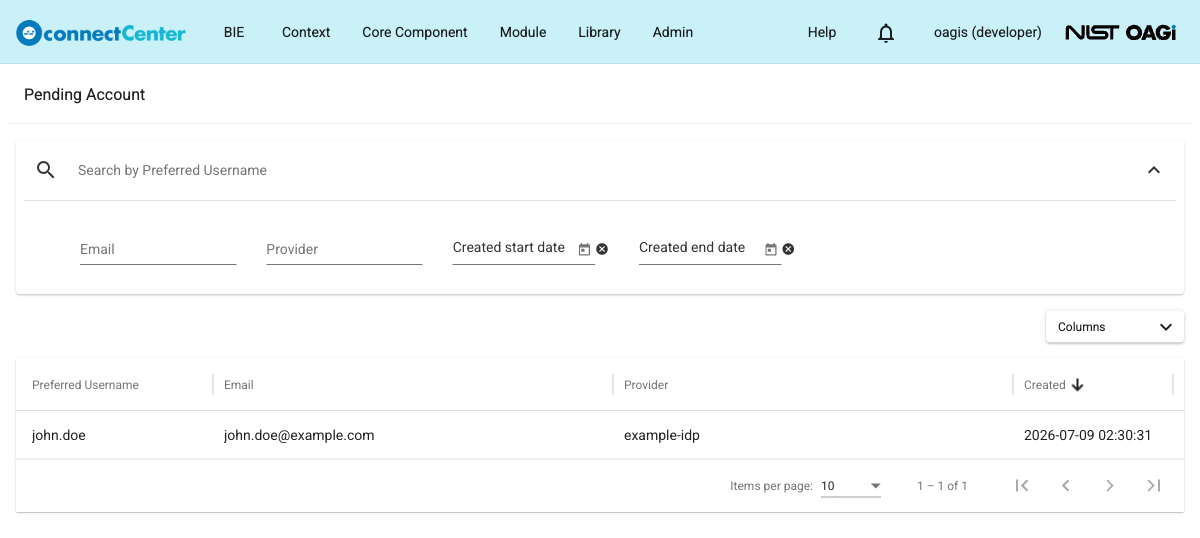
Only users with the Admin right can review pending SSO sign-in requests, from the "Admin" menu. The menu item is labeled "Pending SSO", and it opens the "Pending Account" list page. Only requests that are still waiting for review are listed: once a request is linked or rejected, it disappears from the list.
To open the pending SSO list:
-
Click the "Admin" menu.
-
Choose "Pending SSO" from the drop-down list.
-
On the "Pending Account" page, use the search bar ("Search by Preferred Username") to search by preferred username.
-
If needed, open the advanced search and filter by "Email", "Provider", "Created start date", or "Created end date".
-
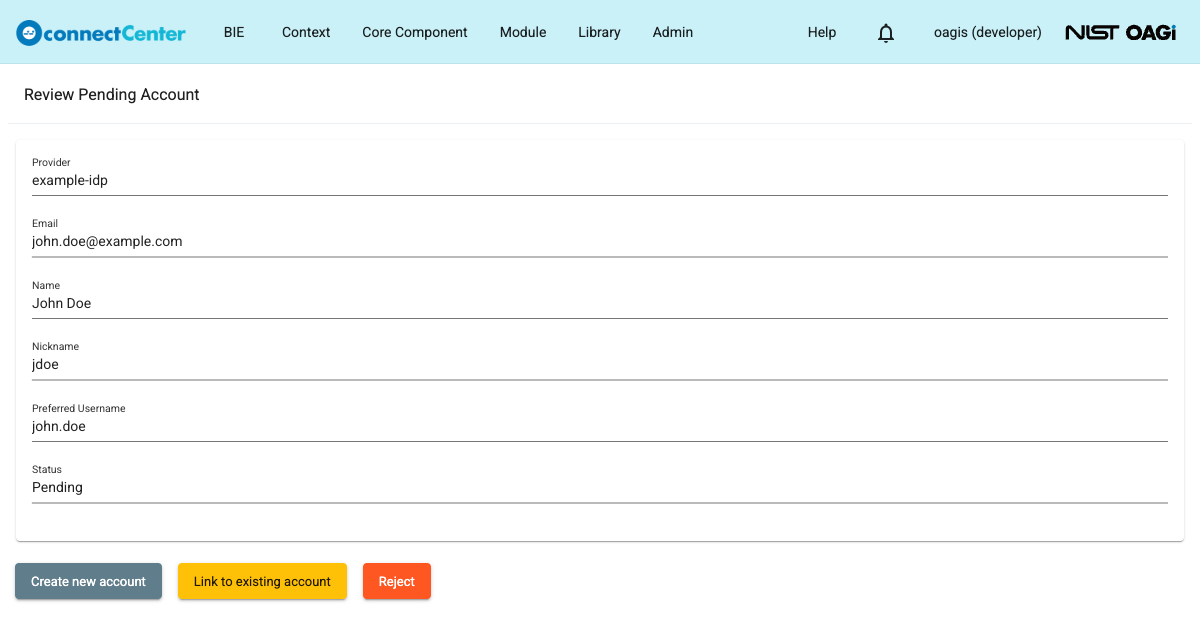
Click the "Preferred Username" or "Email" value of a pending entry to open the "Review Pending Account" page.
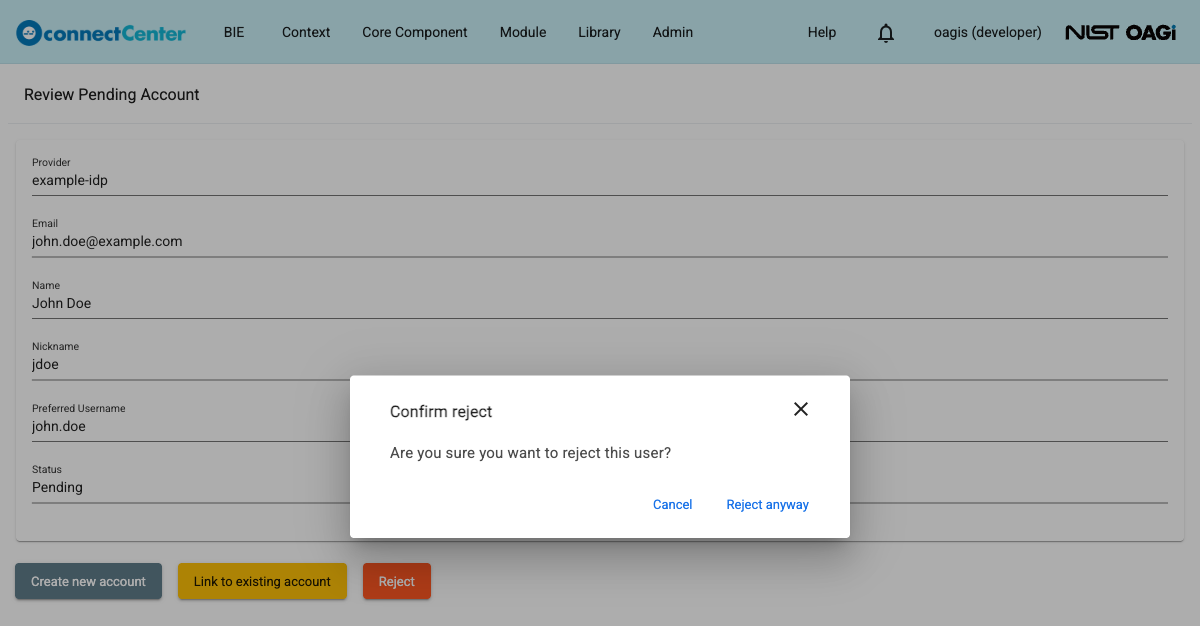
On the "Review Pending Account" page, connectCenter displays the available pending profile fields such as "Provider", "Email", "Name", "Nickname", "Preferred Username", and "Phone", together with the "Status" field. Fields without a value in the pending profile are not shown. While the request is waiting for review, the "Status" field shows "Pending" and the page offers the "Create new account", "Link to existing account", and "Reject" buttons.
Create a new account from a pending SSO request
-
On the "Review Pending Account" page, click "Create new account".
-
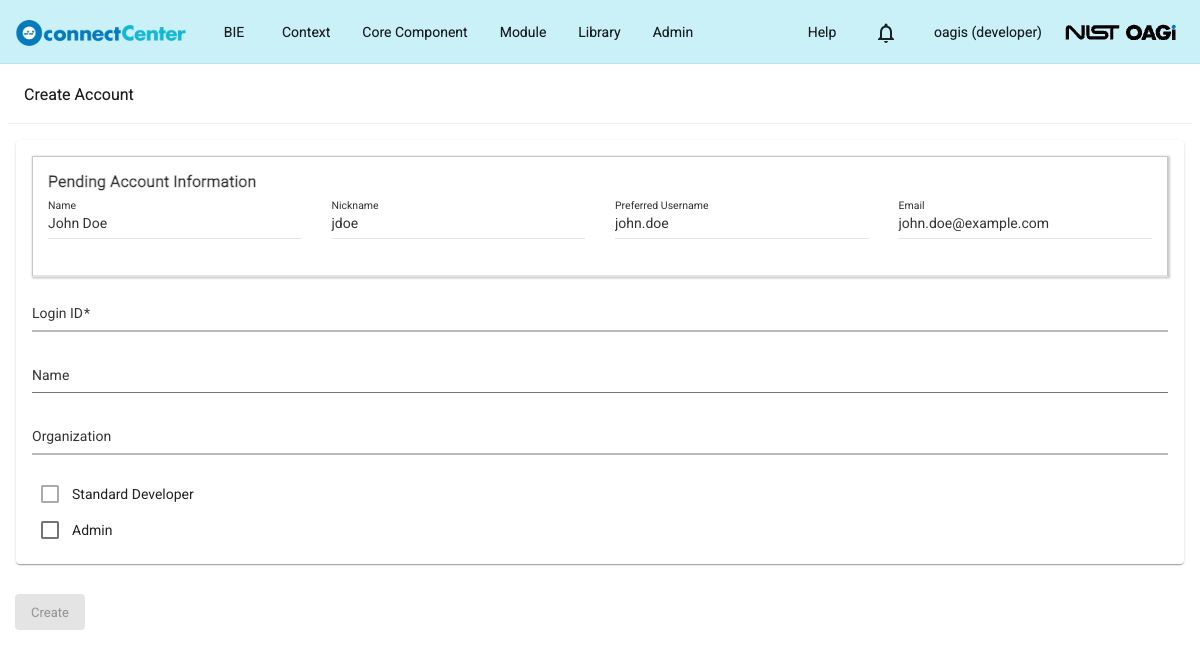
The "Create Account" page opens with a read-only "Pending Account Information" section at the top, showing the Name, Nickname, Preferred Username, and Email from the pending profile when they are available.
-
Enter a unique value in the "Login ID" field.
-
Fill out the "Name" and "Organization" fields as needed. They start empty; the pending profile values are not copied into the form.
-
If needed, check the "Admin" checkbox. In this flow, the "Standard Developer" checkbox is disabled and the password fields are not shown (see Create a User).
-
Click the "Create" button.
-
Wait for the "Created" message. connectCenter links the SSO profile to the new account and opens the "Account" list page.
Link a pending SSO request to an existing account
-
On the "Review Pending Account" page, click "Link to existing account".
-
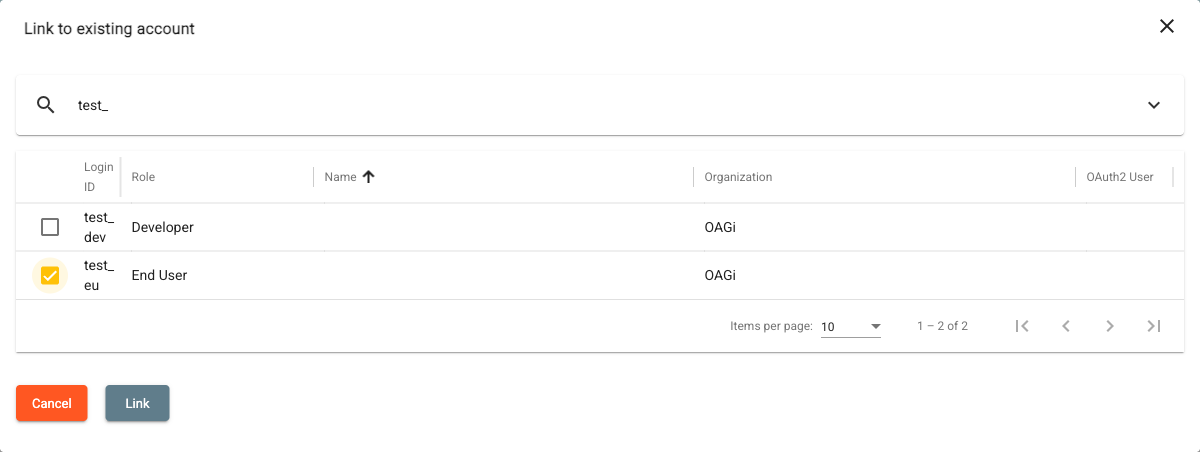
In the "Link to existing account" dialog, use the search bar to search by "Login ID".
-
If needed, open the advanced search and filter by "Name", "Organization", or "Role".
-
Select one account from the list by checking its selection box. The dialog lists only users who are not already linked to an OAuth2 user.
-
Click the "Link" button.
-
Wait for the "Linked" message. The "Status" field of the request changes to "Linked", and the request disappears from the pending list.
Reject a pending SSO request
-
On the "Review Pending Account" page, click "Reject".
-
In the "Confirm reject" dialog, click "Reject anyway". Click "Cancel" if you do not want to reject the request.
-
Wait for the "Rejected" message. After the request is rejected, connectCenter returns to the pending list page.
Rejecting permanently removes the pending request, so it cannot be re-reviewed later. The rejection does not block the user, though: if the user signs in with the same IdP account again, a new pending request is created.