Multi-tenant mode
By default, connectCenter does not use multi-tenant mode. Users with the Admin right can switch the mode on and off from the "Application settings" page.
Enable multi-tenant mode
To enable multi-tenant mode:
-
Click your account name at the top-right of the page.
-
Choose "Settings" from the drop-down list.
-
Click "Application settings" on the left side of the page.
-
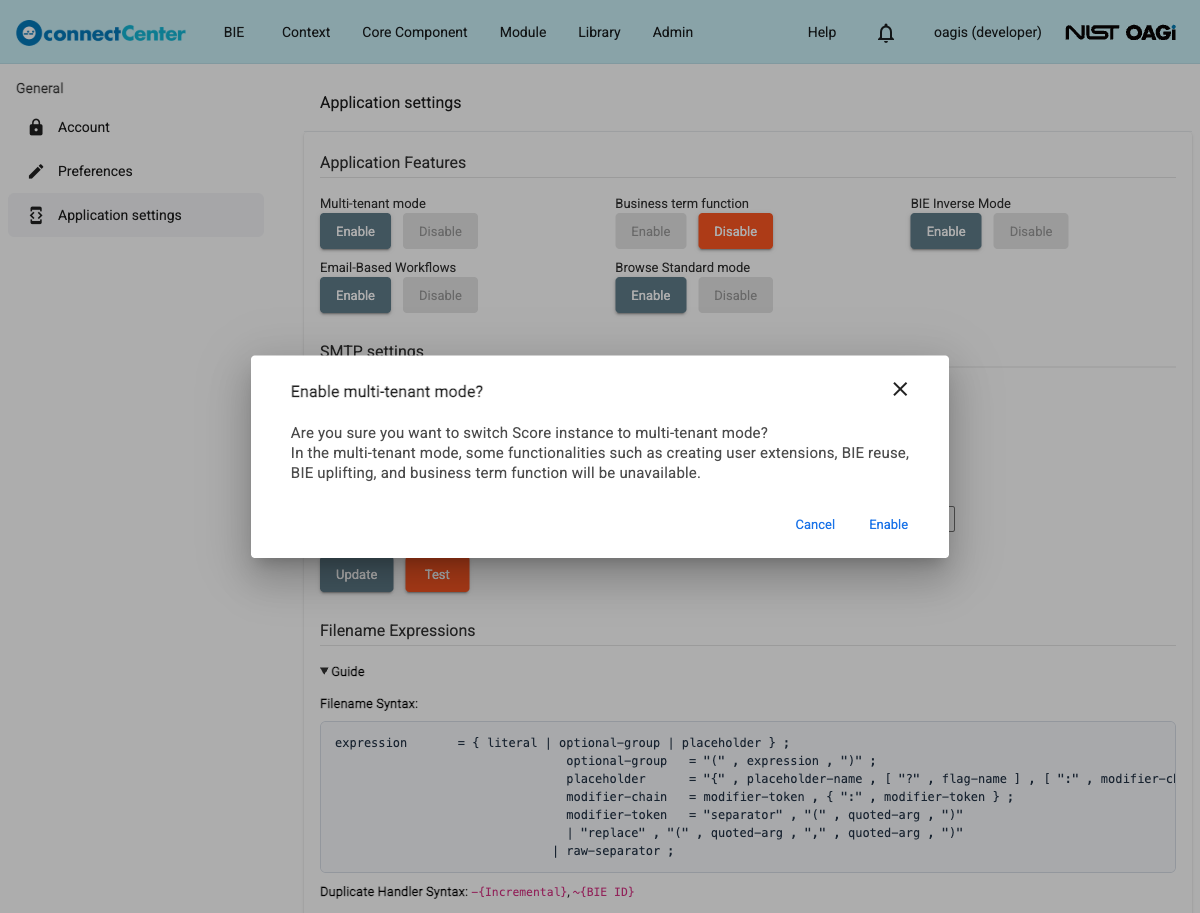
Click "Enable" for "Multi-tenant mode" in the "Application Features" section.
-
In the "Enable multi-tenant mode?" dialog, review the warning that some functionalities such as creating user extensions, BIE reuse, BIE uplifting, and the business term function will be unavailable, and click "Enable". Click "Cancel" if you do not want to change the mode.
-
Wait for the "Updated" message.
Once the mode is on:
-
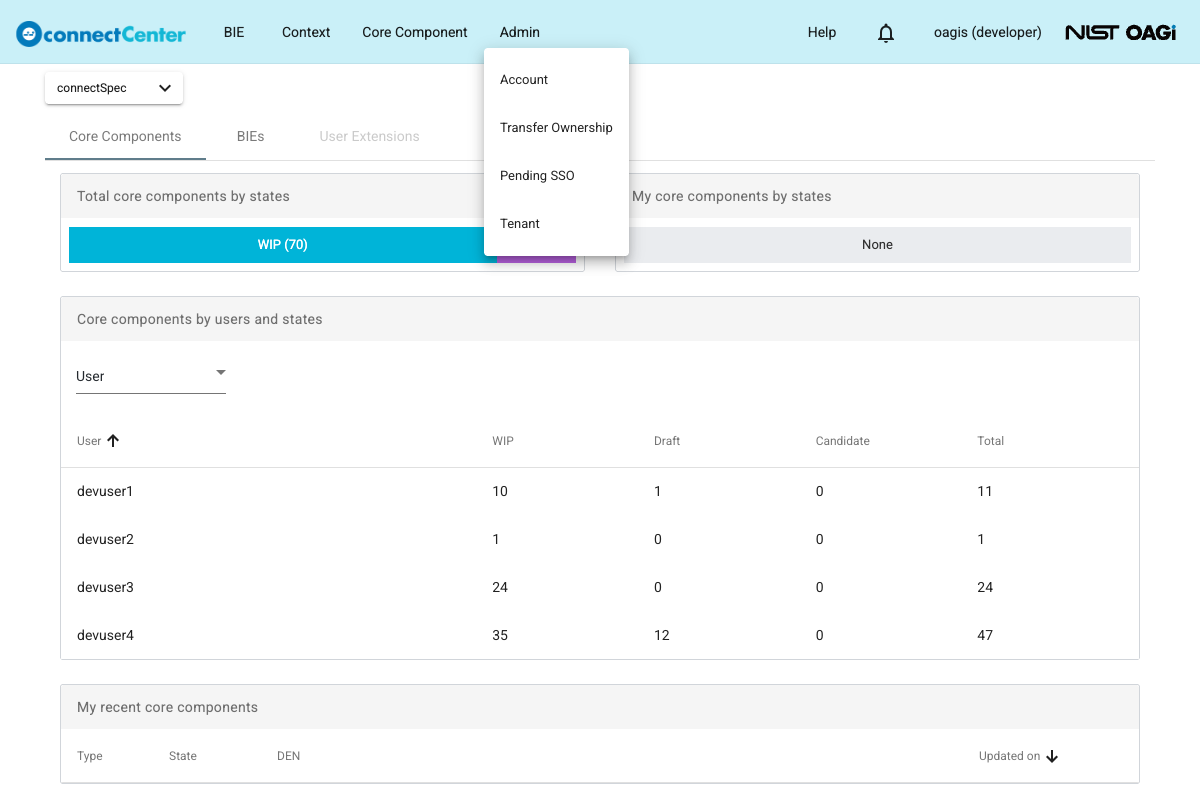
The "Module" and "Library" menus disappear from the top menu, the "Context" menu is shown only to users with the Admin right, and a "Tenant" menu item appears under the "Admin" menu. See Multi-tenant mode feature restrictions.
-
The business term function is automatically disabled, and its "Enable"/"Disable" buttons on the "Application settings" page stay unavailable while multi-tenant mode is on.
Some changes take effect for other users after they sign in again.
Add a tenant
To add a tenant:
-
Choose "Admin" and then "Tenant".
-
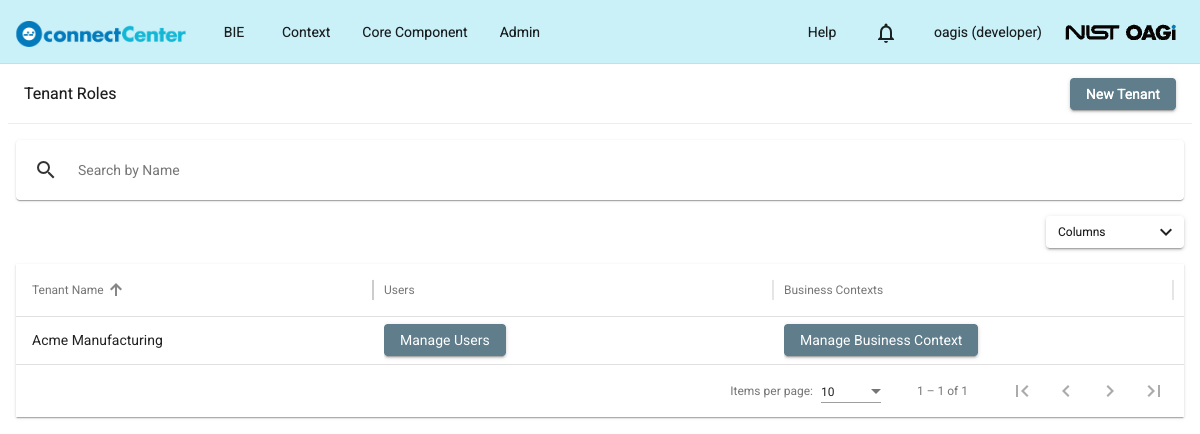
On the "Tenant Roles" page, click the "New Tenant" button.
-
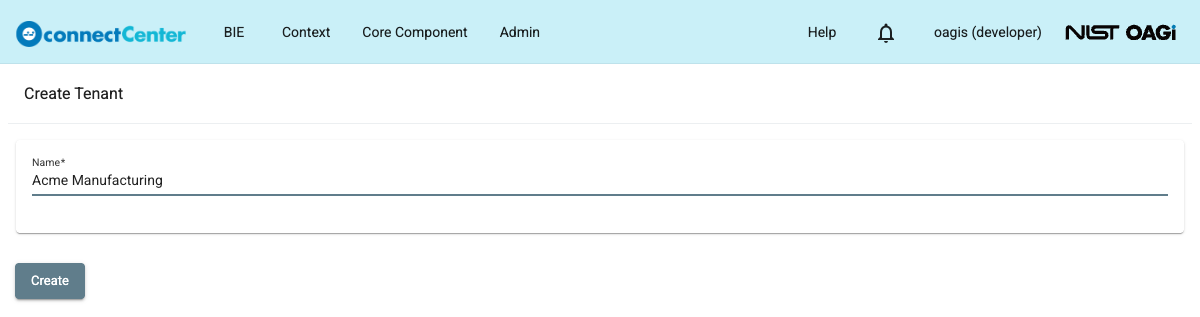
On the "Create Tenant" page, enter a value in the Name field. The "Name" field is a free form text of at most 50 characters. This field is mandatory; the "Create" button stays disabled until a name is entered.
-
Click the "Create" button. A "Created" message confirms the creation and the "Tenant Roles" page is reloaded.
On the "Tenant Roles" page, use the "Search by Name" bar at the top of the page to search for the desired tenant, and click the "Tenant Name" column header to sort the tenants.
Rename a tenant
-
On the "Tenant Roles" page, click on the name of the tenant.
-
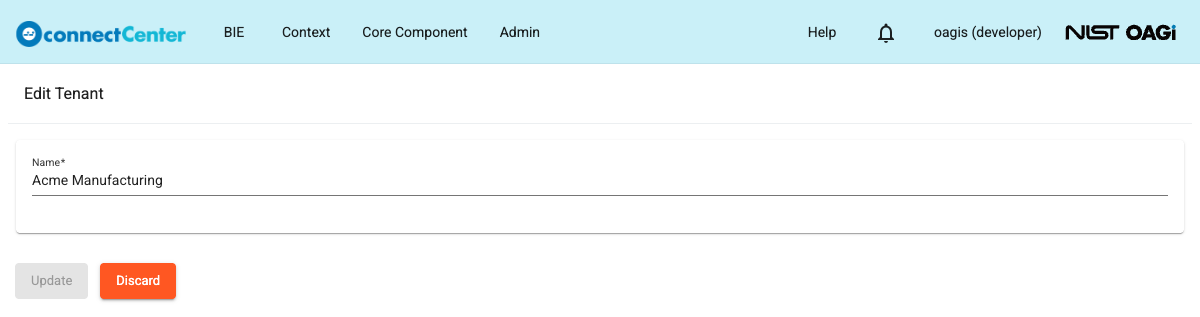
On the returned "Edit Tenant" page, change the Name field.
-
Click "Update" to save the change. The button stays disabled until the name is actually changed.
Discard a tenant
To discard a tenant:
-
On the "Tenant Roles" page, click on the name of the tenant.
-
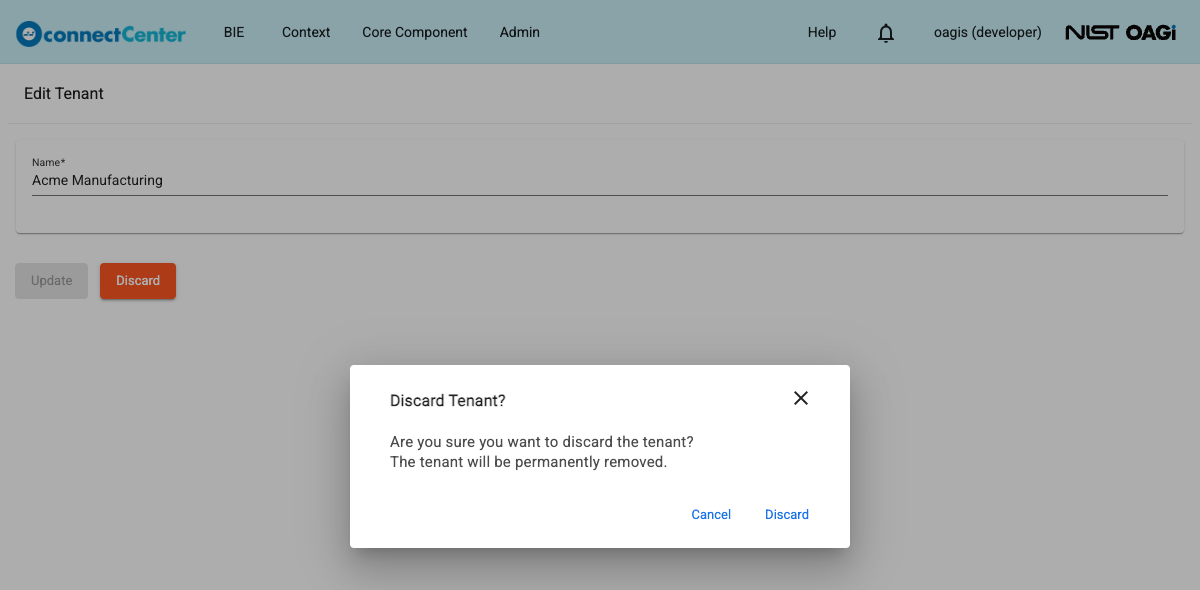
On the returned "Edit Tenant" page, click the "Discard" button.
-
In the returned "Discard Tenant?" dialog, confirm your intention by clicking "Discard"; or click "Cancel" to go back. The tenant and its user and business context associations are permanently removed.
Disable multi-tenant mode
To disable multi-tenant mode, click "Disable" for "Multi-tenant mode" on the "Application settings" page. The "Disable multi-tenant mode?" dialog warns that you may lose some data in regard to tenants; click "Disable" to confirm.
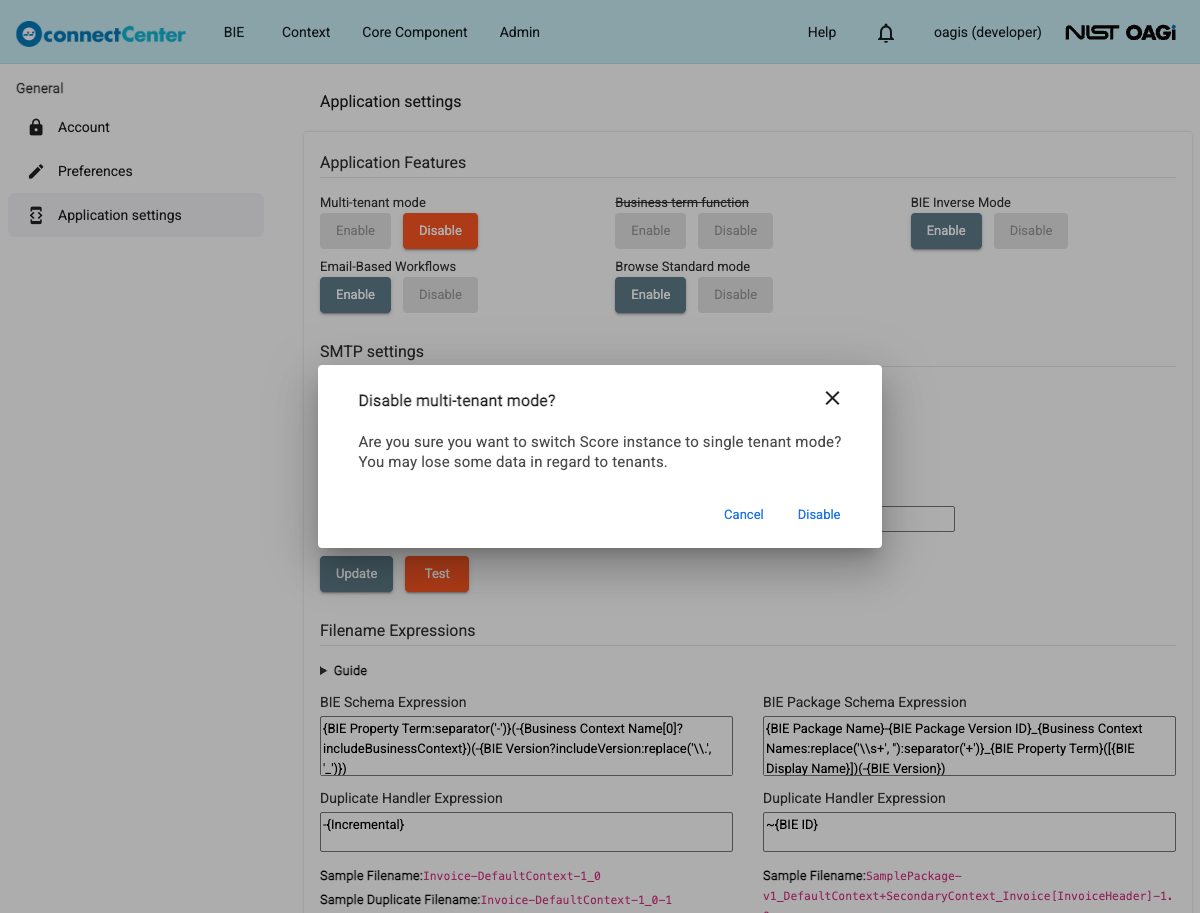
Note that the business term function stays disabled after multi-tenant mode is switched off; re-enable it separately if it was in use before.