Create a User
Only a user with the Admin right can create a user account. The "Admin" menu used below appears in the top menu only for users with the Admin right.
-
First, sign in using an account that has the Admin right.
-
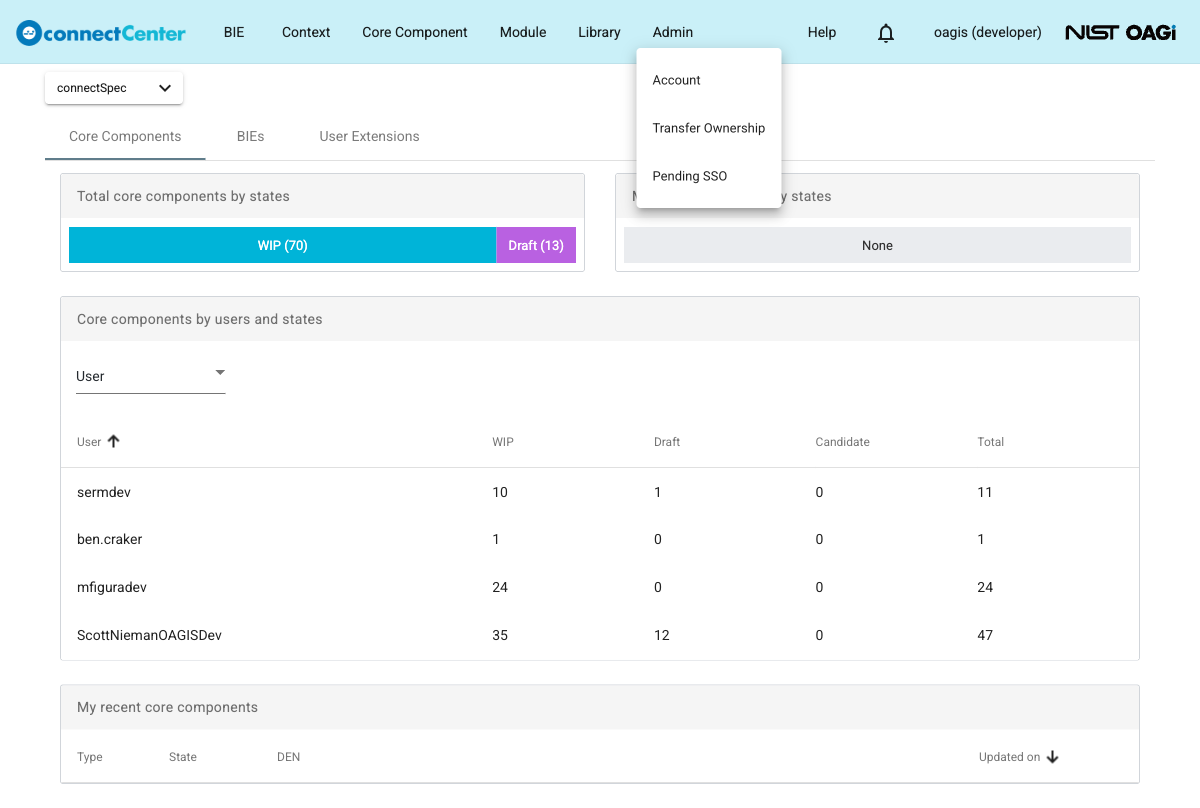
On the top menu, click the "Admin" menu and click "Account" from the drop-down list.
-
On the "Account" page, click the "New Account" button.
-
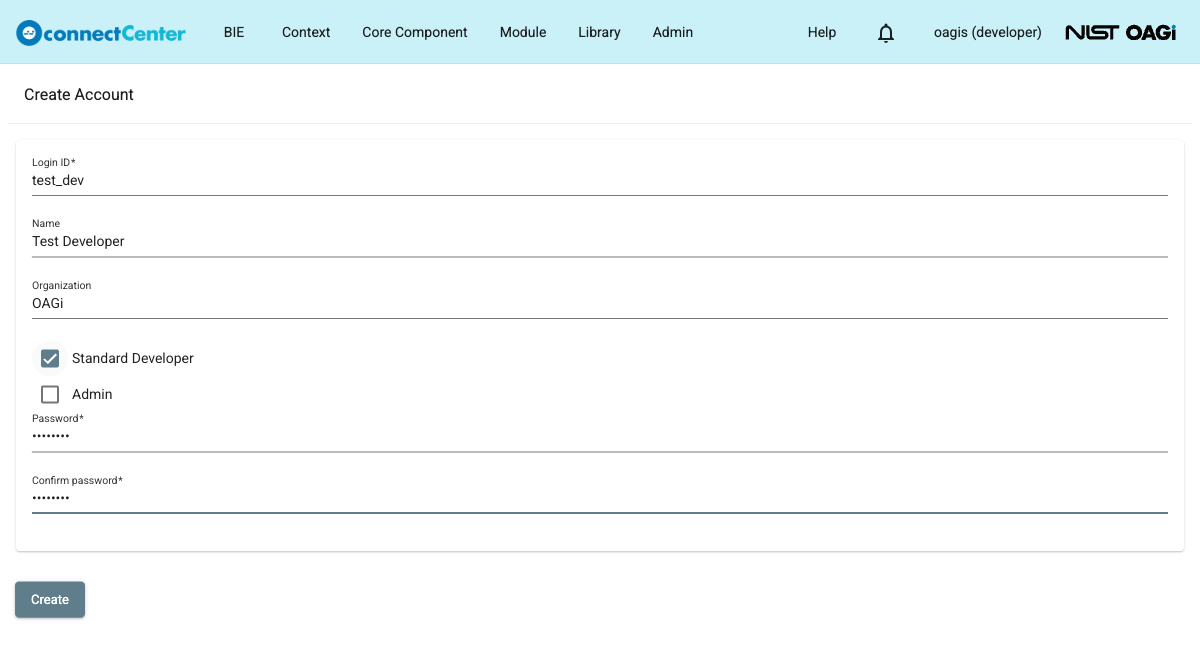
On the "Create Account" page, fill out the following fields:
-
"Login ID", which is the username of the account (Mandatory). When you leave the field, connectCenter checks that the Login ID is not already taken. The Login ID can later be changed, but only by a user with the Admin right on the "Edit Account" page (see Update User’s Information).
-
"Name" (Optional).
-
"Organization" (Optional).
-
Leave the "Standard Developer" checkbox unchecked to create an End User. Check the checkbox to create a Standard Developer.
-
Use the checkbox named "Admin" to assign the Admin right to the user account being created. The Admin right allows the user to manage other user accounts.
-
"Password" (Mandatory).
-
"Confirm password" (Mandatory).
noteThe password must be at least five characters.
-
-
Click the "Create" button. The "Create" button stays disabled until the mandatory fields are valid and the two passwords match. After the account is created, connectCenter shows a "Created" message and returns to the "Account" page.
Creating an account from a pending SSO request
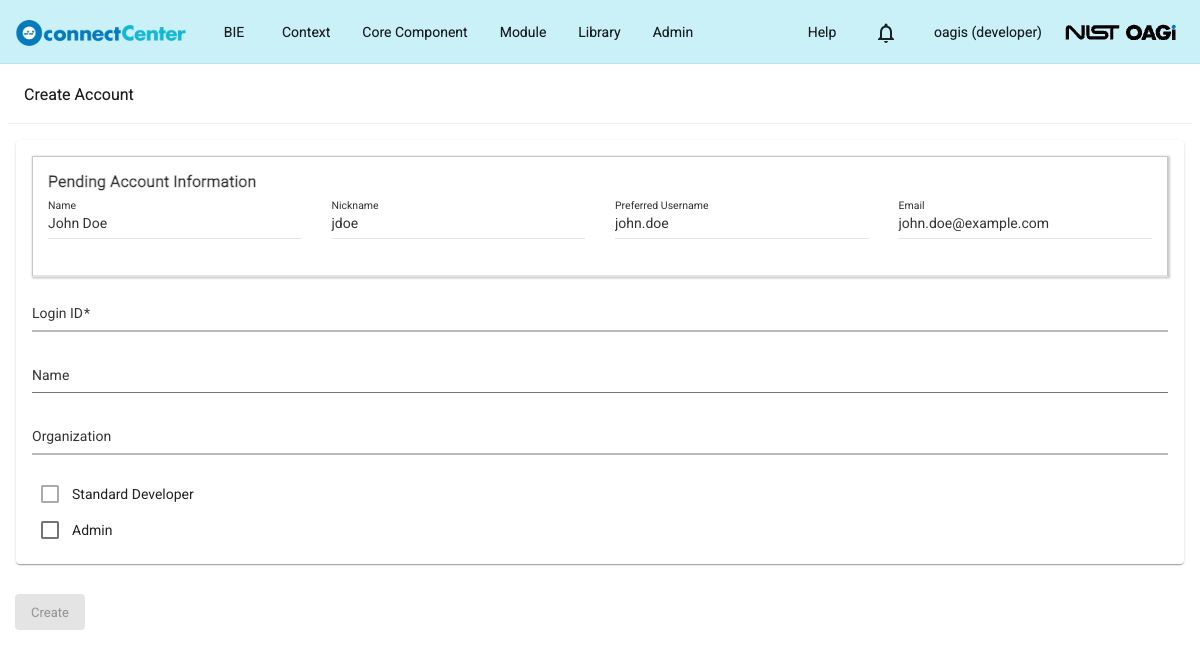
When the account is created from a pending SSO request (see Using Single Sign-On), the "Create Account" page differs in a few ways:
- A read-only "Pending Account Information" section appears at the top, showing the Name, Nickname, Preferred Username, and Email from the pending profile when they are available. The editable fields below it start empty.
- The "Password" and "Confirm password" fields are not shown because the user signs in through the external identity provider.
- The "Standard Developer" checkbox is disabled: accounts created from SSO requests are always End Users.
For more information about disabling, enabling, and removing user accounts, see Enable or Disable User Account.